Assign Dedicated Credit Card Processing to POS Workstations
Connected Business 15 enables POS administrators to assign individual workstations to a single dedicated merchant login for processing credit card transactions. In order to use this feature, the company is required to register one or more login accounts through the Interprise Gateway v2.0 credit card processing system.
Setting up your workstations to exclusively process a single merchant account means that you are disabling the POS setting which uses your customers' ShipTo Payment Type for credit card processing. This setting is disabled using the Settings screen in the POS interface.

This feature is only available in Connected Business v15 and higher.
Setup POS Payment Terms and Payment Types
Before you can apply this feature to POS, you need to set up payment terms and types that are specific to your POS workstations. To do this, perform the following procedures:
-
Register one or more Interprise Gateway v2.0 accounts to be assigned to your POS. Consult our documentation on Interprise Gateway v2.0 and perform the steps outline there. The account names and passwords created through this step are necessary for completing this process. File them in a secure location.
-
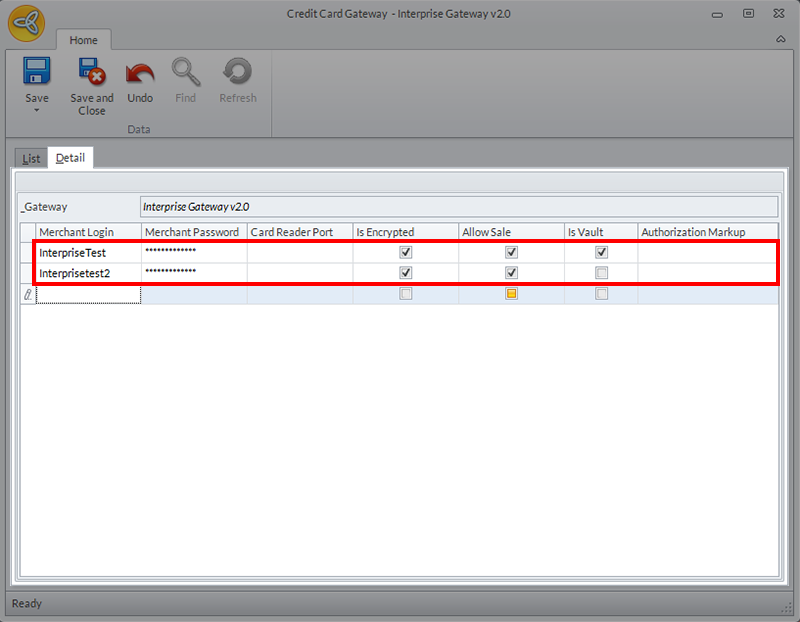
Go to Connected Business and open the Banking module. Click Setup > Credit Card Gateway to load the list of available gateways. Double click Interprise Gateway v2.0 to display the Details tab.
-
In the Details tab, input the Merchant Login, Password, and other merchant information that you have registered in Step 1. You can also configure other settings to fit your workflow.
Click Image to Enlarge
Click Save and Close.
-
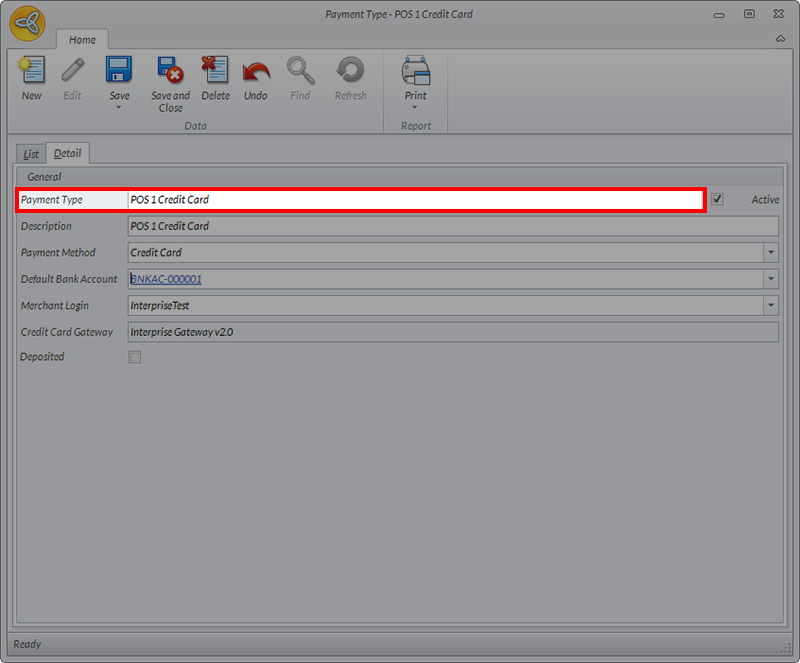
Next, you need to create dedicated payment types. Go to Banking > Setup > Payment > Payment Type. Click on the New button. On the Payment Type field of the form, you can use a file name that will indicate that this payment type is dedicated for a specific POS workstation.
Click Image to Enlarge
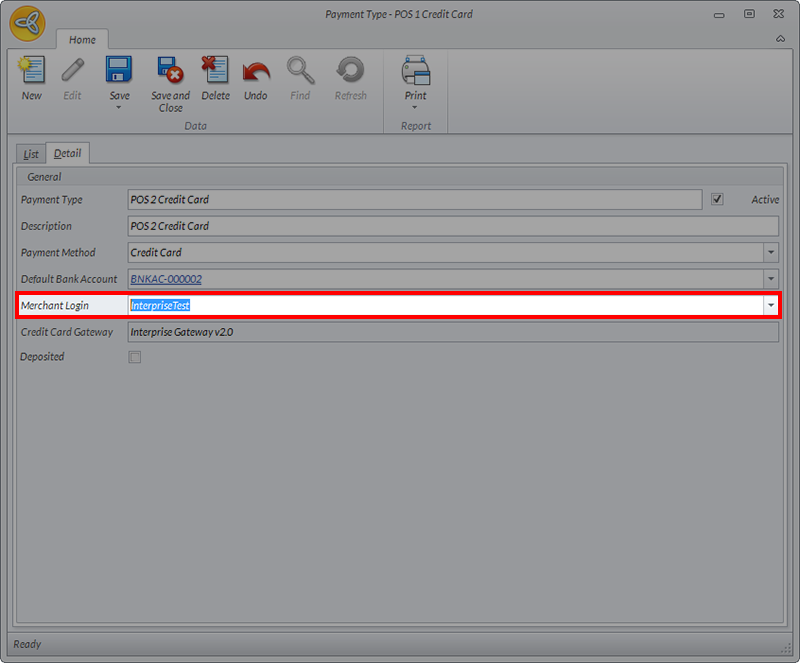
On the dropdown field labeled Merchant Login, choose the credit card gateway account that you want to associate with this payment type.
Click Image to Enlarge
After filling in the other required fields such as description, payment method, and default bank account, click Save and Close.
-
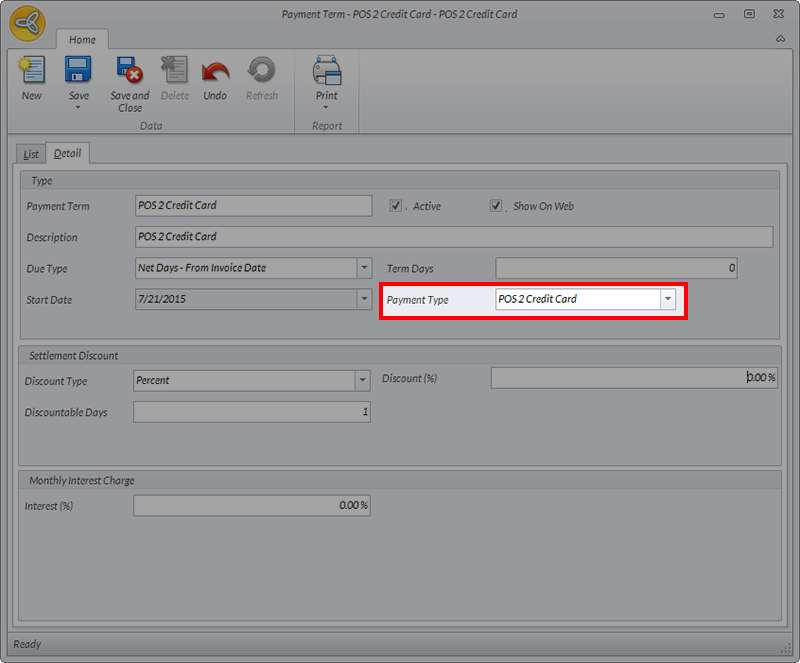
Create a new set of Payment Terms to be associated with your POS workstations. Go to Banking > Setup > Payment > Payment Terms to load the form. Click the New button.
The form for the new payment term will be displayed. Input the details such as the name, description and due type. On the dropdown field for Payment Type, select the POS payment terms that you have previously created.
Click Image to Enlarge
Click Save and Close.
-
To view the list of Payment Types that you have configured, go to Banking > Setup > Payment > Type.
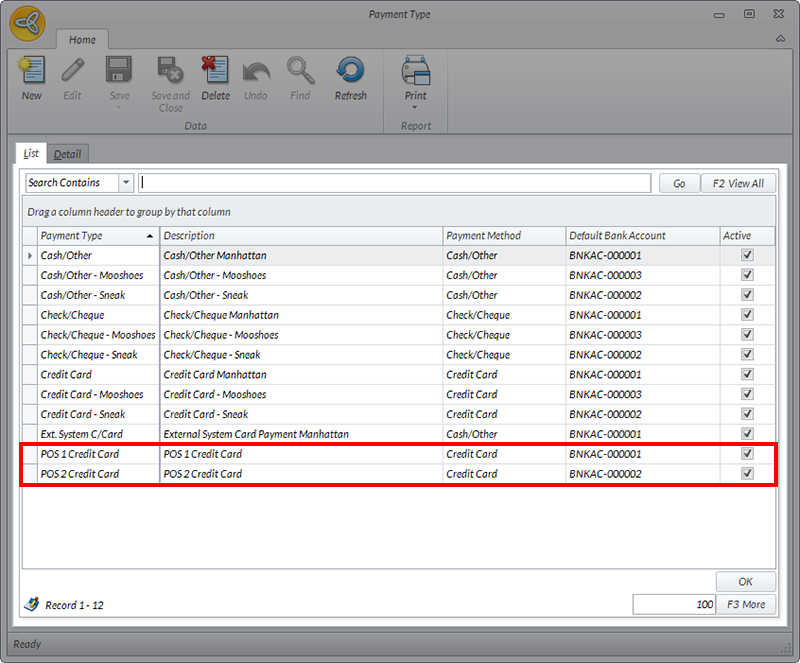
Click Image to Enlarge
Configure POS For Single Merchant Processing
The actions described in this set of instructions are performed through the POS interface. Log into the system using an Administrator account, and perform the following actions:
-
On the POS dashboard, go to Settings > General tab. Scroll down the list of settings and select the controls for Use Customer ShipTo Payment Type for Credit Card Payment.
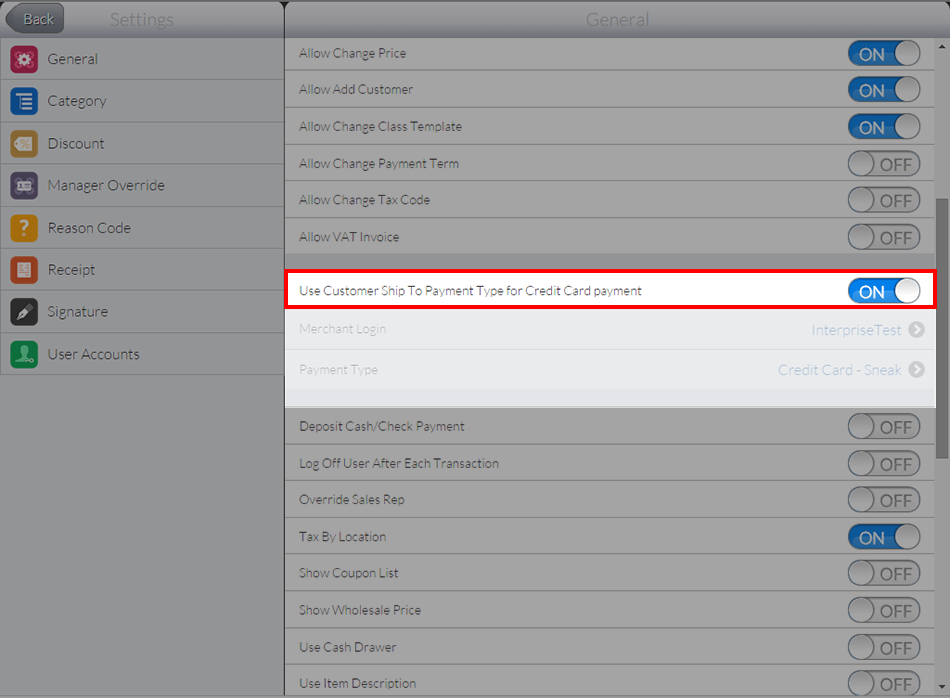
Click Image to Enlarge
-
By default, this setting is enabled in POS, as indicated by the ON button. Toggle the controls to OFF so that the setting for Merchant Login and Payment Type are enabled.
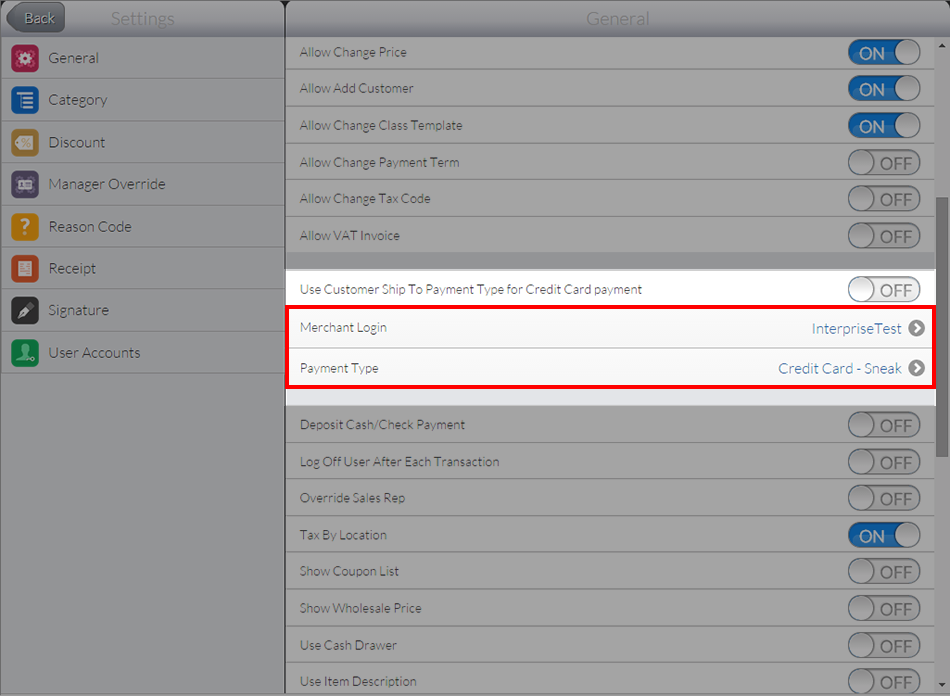
Click Image to Enlarge
-
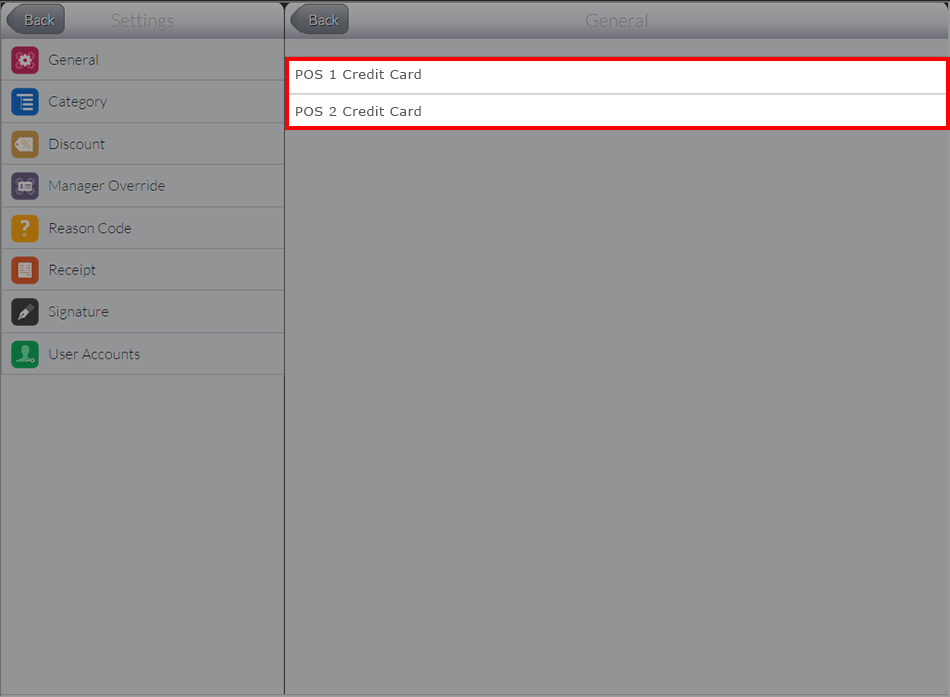
Tap on the Merchant Login settings to display the list of credit card merchant gateways that have been set up through the previous subcategory. Tap on one account to assign to your work station. Once the correct merchant gateway has been selected, tap on the Back button to save your choices.

Click Image to Enlarge
-
Back on the Settings interface, tap on Payment Type to choose from one of the payment types associated with the merchant login. Tap the Back button to save your changes.
Click Image to Enlarge
The POS settings display will only list the Payment Types that have been assigned to the specific gateway you have chosen in Step 3. If the Payment Type you wanted is not listed on the screen, go back to Connected Business and check if it has been properly assigned to the correct merchant gateway.