Configure POS Reason Codes
You can require reason codes for every changes in POS transactions such as voiding the item or transaction, given discounts, and returns. This allows you to enter the cause on why these changes are applied.
Click Image to Enlarge
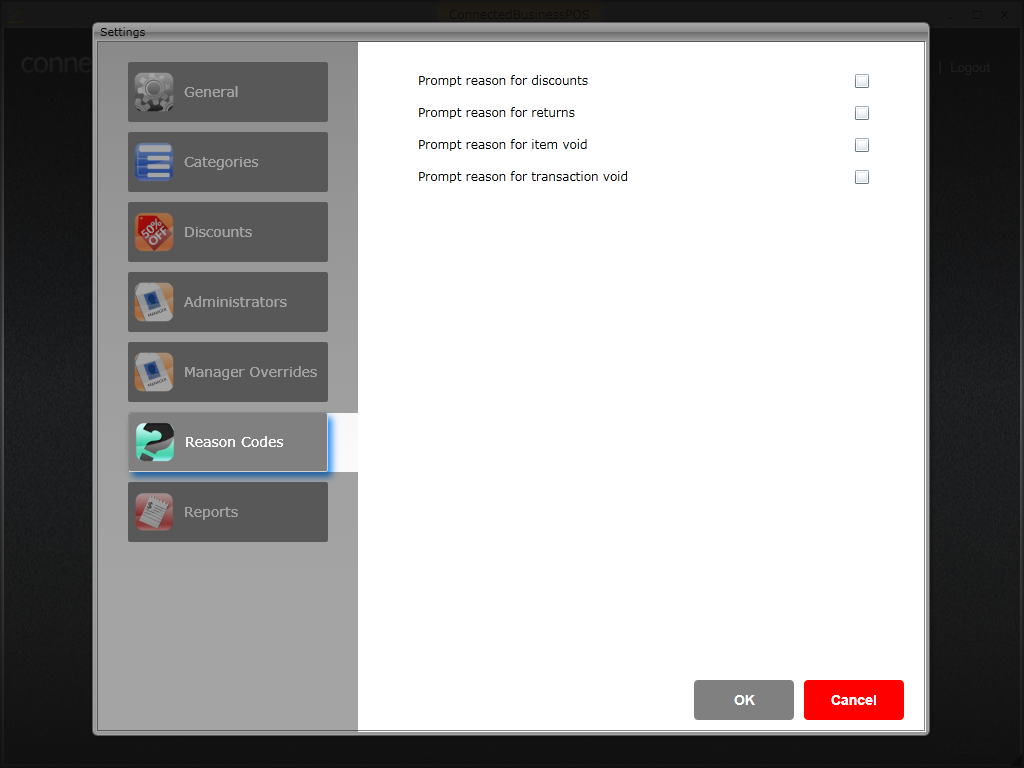
The table below describes the function of each reason code in Connected Business POS.
| Field Name | Description |
| Discount | Enables the user to log reasons for every discount given to customer transactions or items. |
| Returns | Enables the user to log reasons for every return(s). |
| Item Void | Enables the user to log reasons for voiding the item. |
| Transaction Void | Enables the user to log reasons for voiding the transaction. |
Require Reason Codes
To set reason codes for POS transaction, simply tick the checkbox right next to the reason code and click OK to apply the changes.

Click Image to Enlarge
![]()
Apply Reason Code
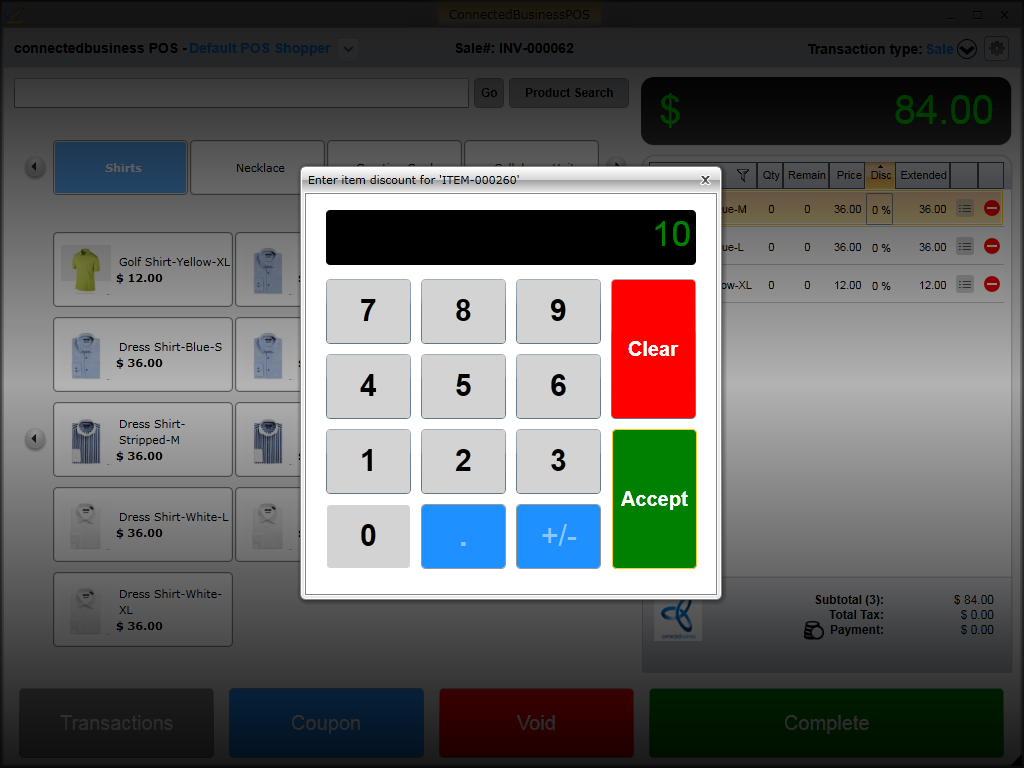
Enter Reason for Discount
To enter the reason for giving a discount,
- Select the transaction type (Sale, Order, Quote) and enter items for checkout.
- Click the % value under the Discount column.

Click Image to Enlarge
- The Enter Item Discount window will be displayed. Specify the discount value and click Accept.
Click Image to Enlarge
- The Enter your reason window will be displayed. You can manually enter the reason for giving the discount or if you have predefined reason codes set up in Connected Business, click the Select Reason button.
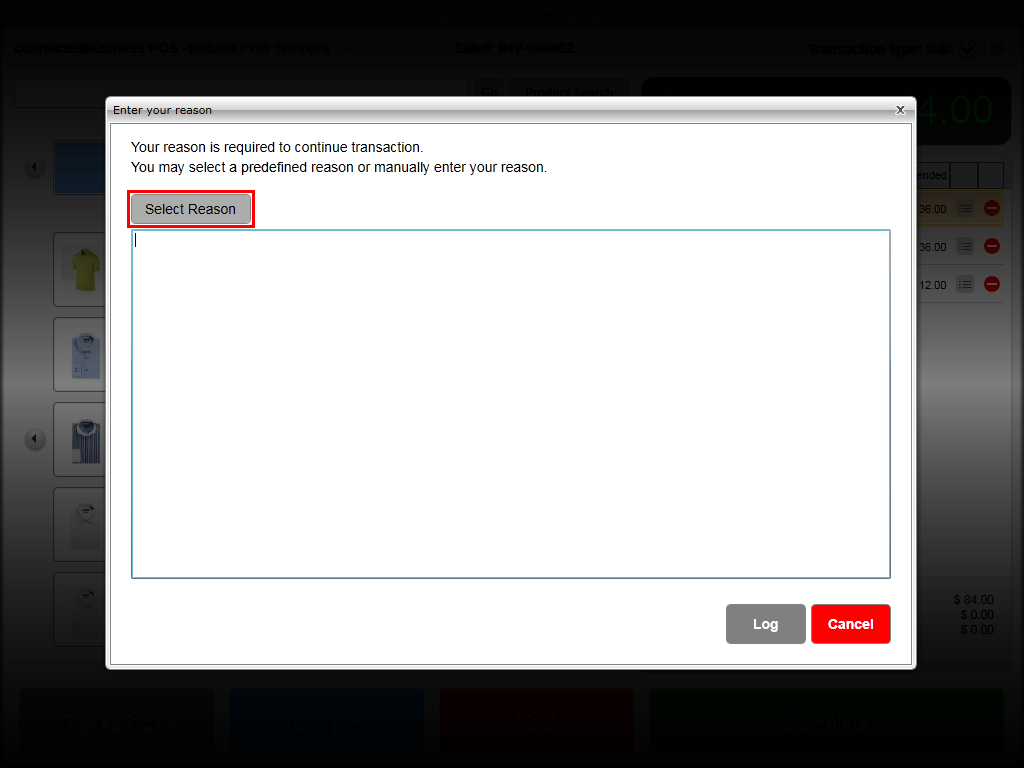
Click Image to Enlarge
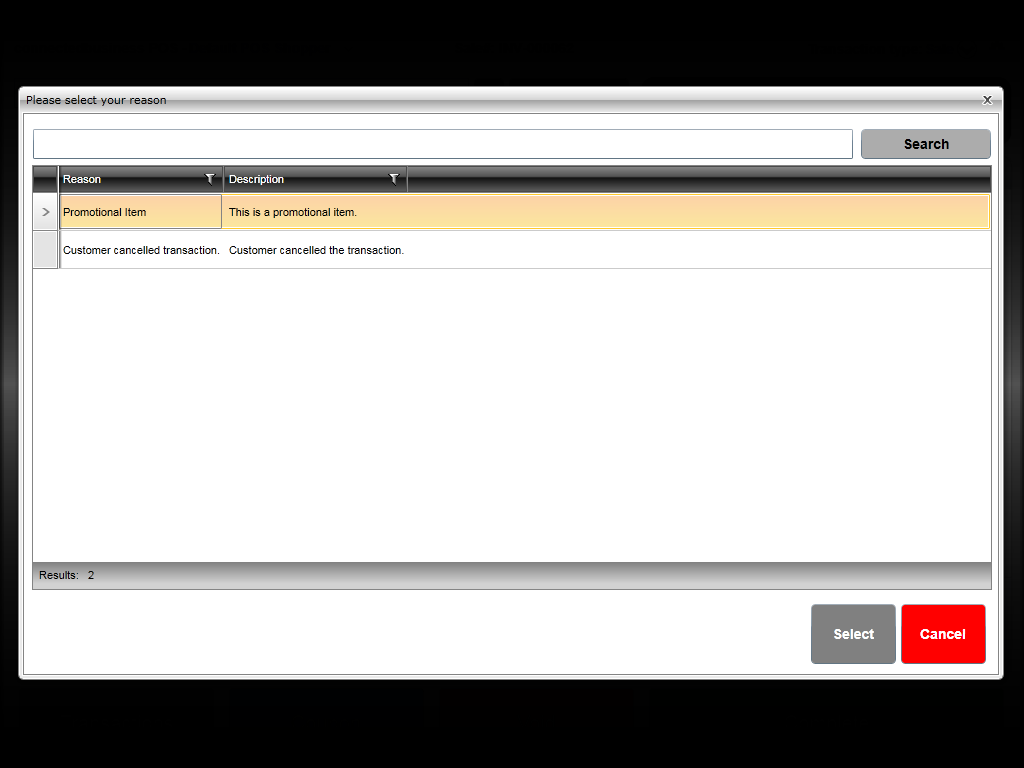
Upon clicking the Select Reason button, the list of predefined reason codes will be displayed.
Click Image to Enlarge
- Select the reason for the transaction and click Select. The reason will be automatically loaded in the Enter your reason window.
Click Image to Enlarge
- Click Log to save reason details.
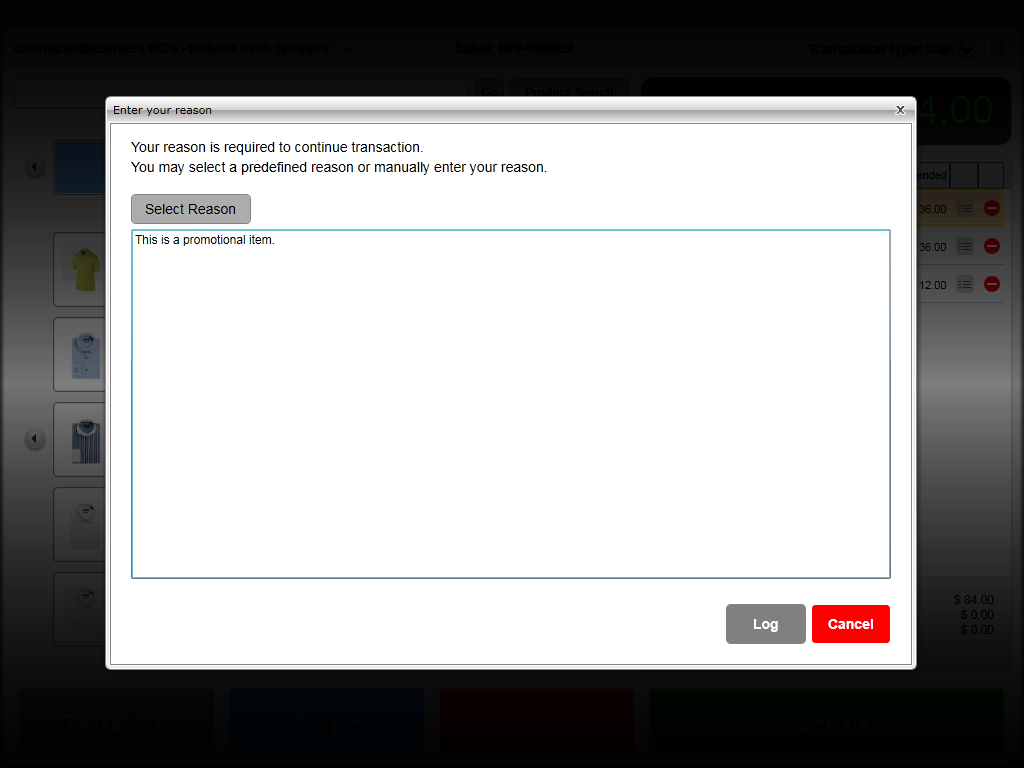
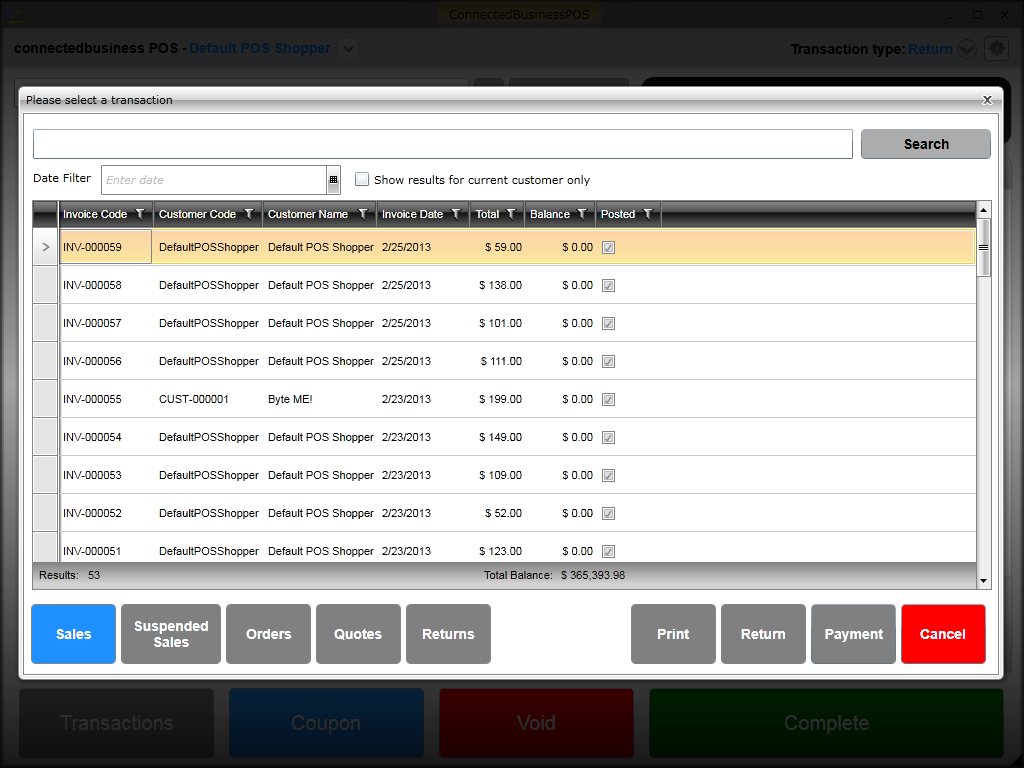
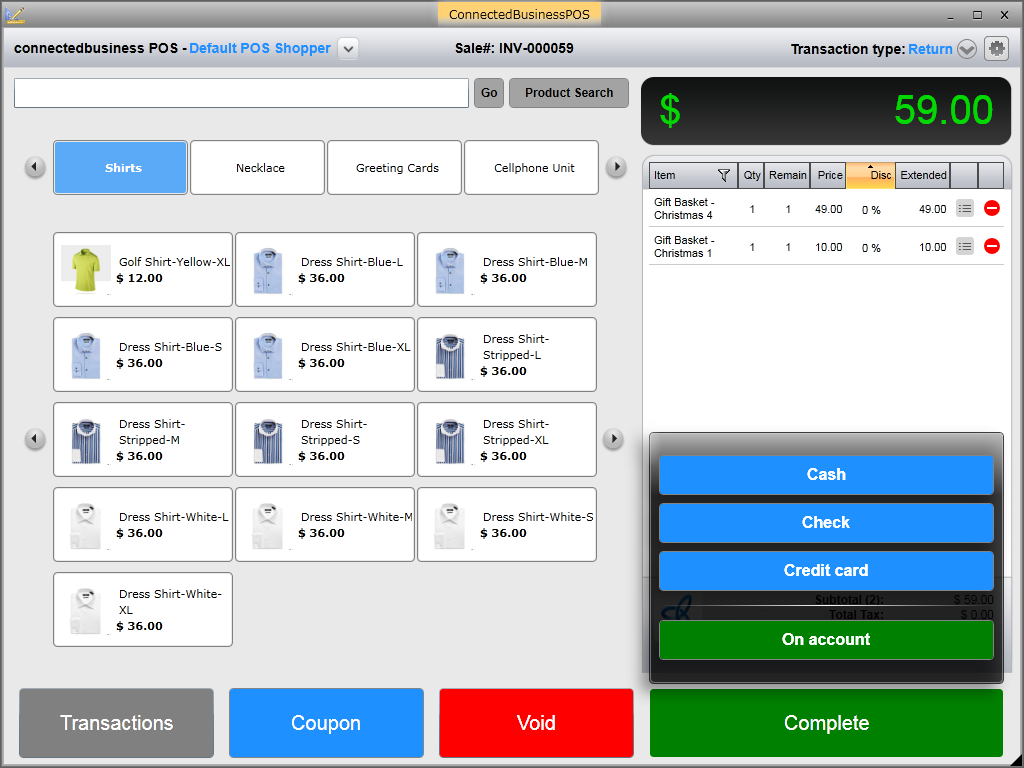
Enter Reason for Return
To enter reason for returned items,
- Set the transaction type to Returns. The list of active invoices will be displayed.
- Select the invoice to be processed and click Return.
Click Image to Enlarge
The transaction details will be displayed.
Click Image to Enlarge
- Click Complete and select the payment type for the refund.
- The Enter your reason window will be displayed. You can manually enter the reason for the return or click the Select Reason button if you have predefined reason codes set up in Connected Business.

Click Image to Enlarge
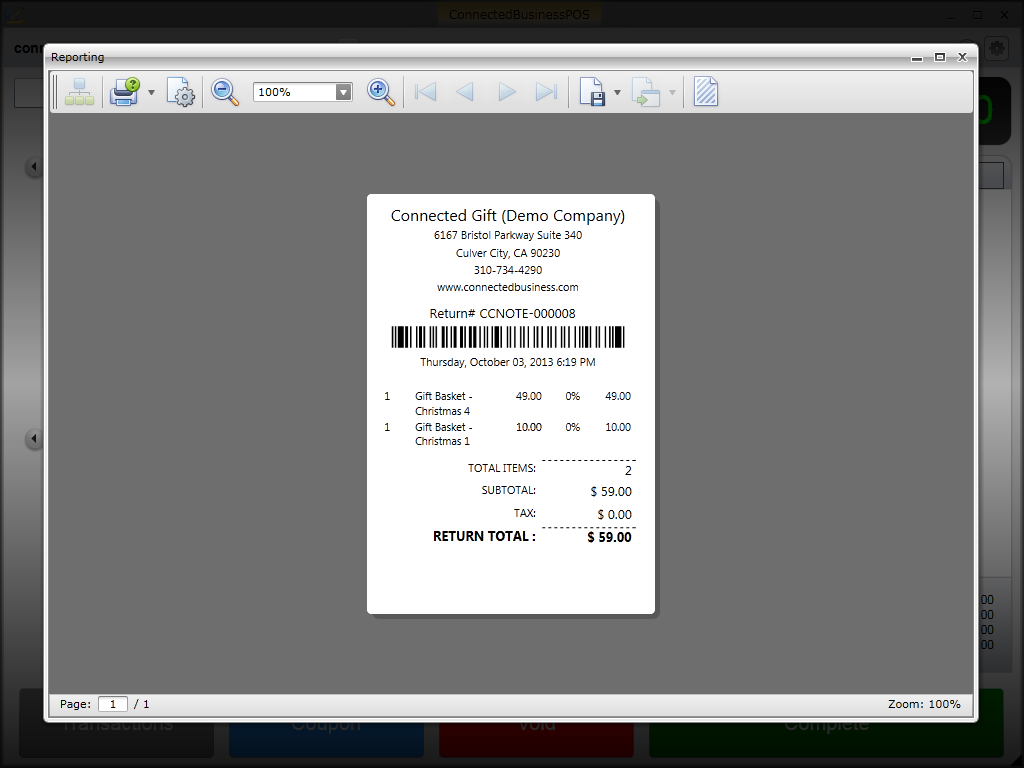
- Click Log to save reason details. A preview window of the credit note will be generated. You can opt to print the receipt or close the window to process another transaction.
Click Image to Enlarge
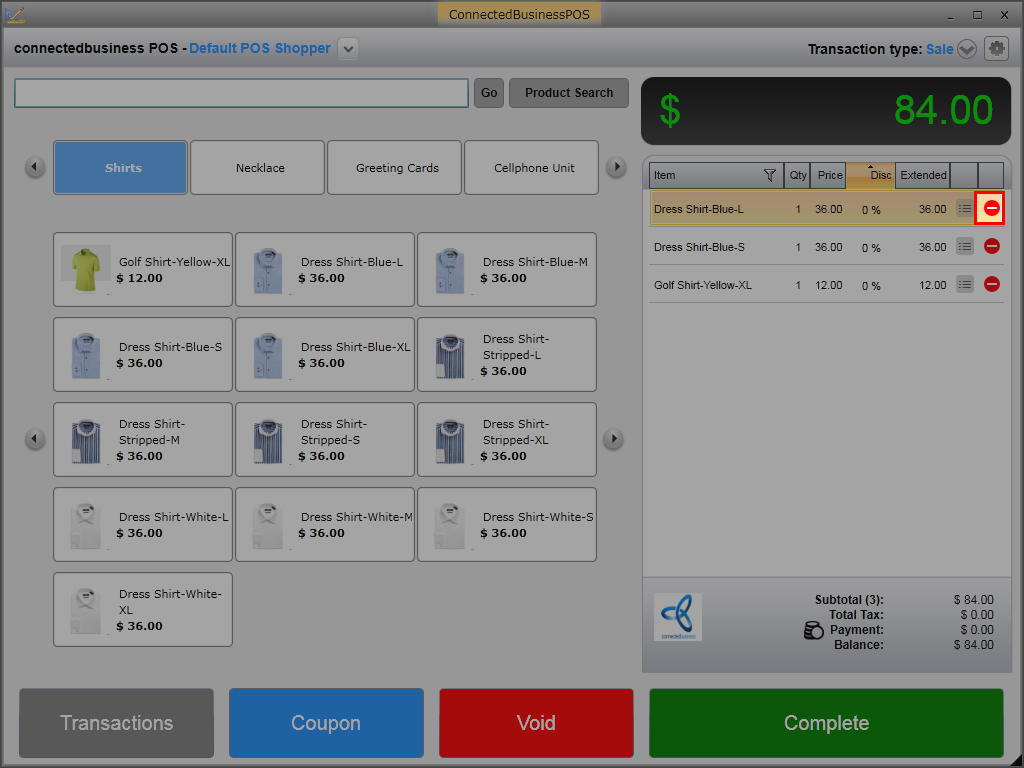
Enter Reason for Voiding Item
To enter reason code for voiding an item,
- Select the transaction type (Sale, Order, Quote, Return) and enter items for checkout (if the transaction is Return, items will be automatically loaded in the Transaction Detail panel).
- Click the Void icon right beside the item to be deleted.
Click Image to Enlarge
- The Enter your reason window will be displayed. You can manually enter the reason for voiding the item or click the Select Reason button if you have predefined reason codes set up in Connected Business.
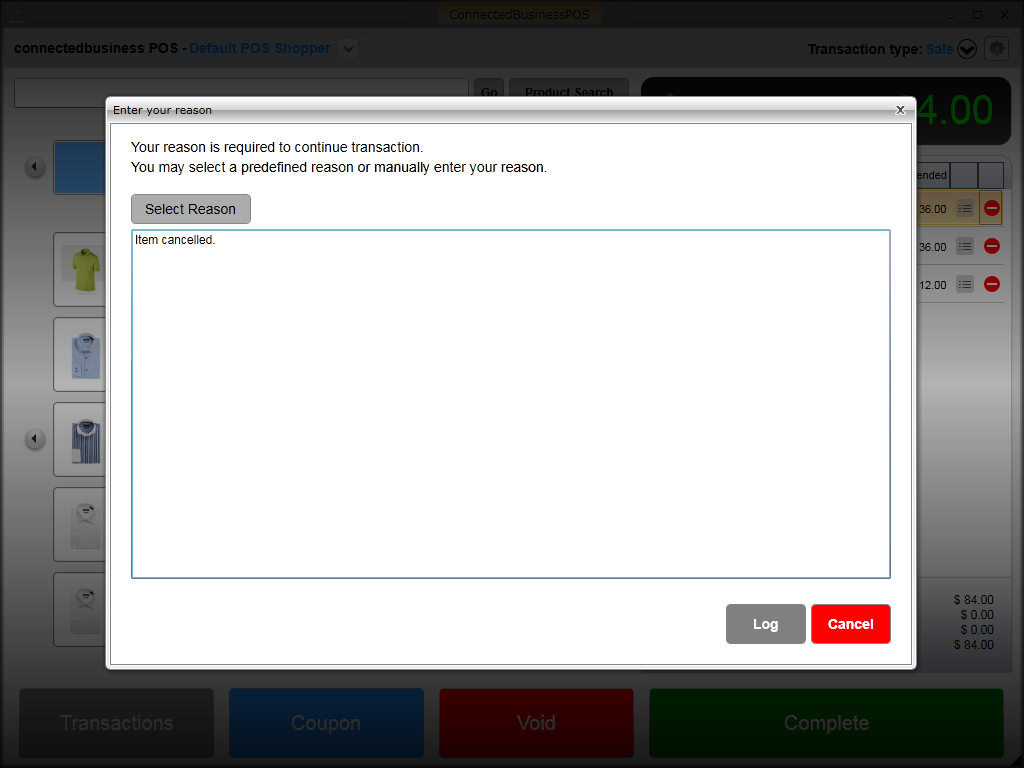
Click Image to Enlarge
- Click Log to save reason details. The selected item will be deleted from the list.
Enter Reason for Voiding Transaction
To enter reason code for voiding the transaction,
- Select the transaction type (Sale, Order, Quote, Return) and enter items for checkout.
- Click the Void button. A Void Transaction pop-up window will be displayed confirming if you want to void the transaction or not. Click OK.
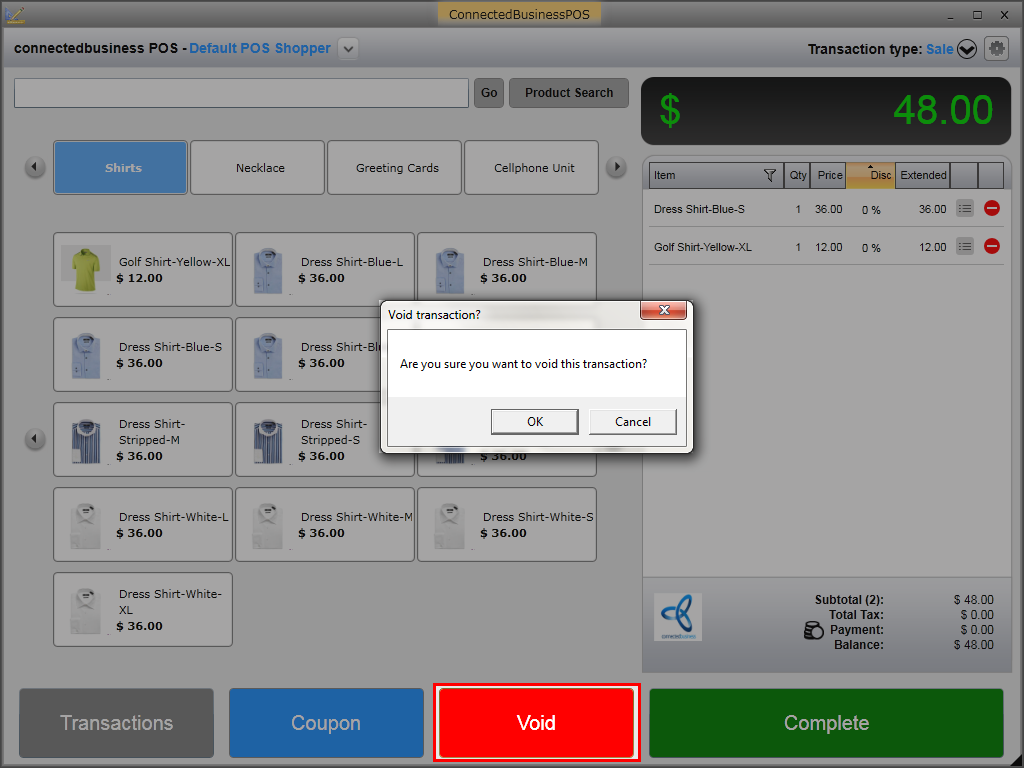
Click Image to Enlarge
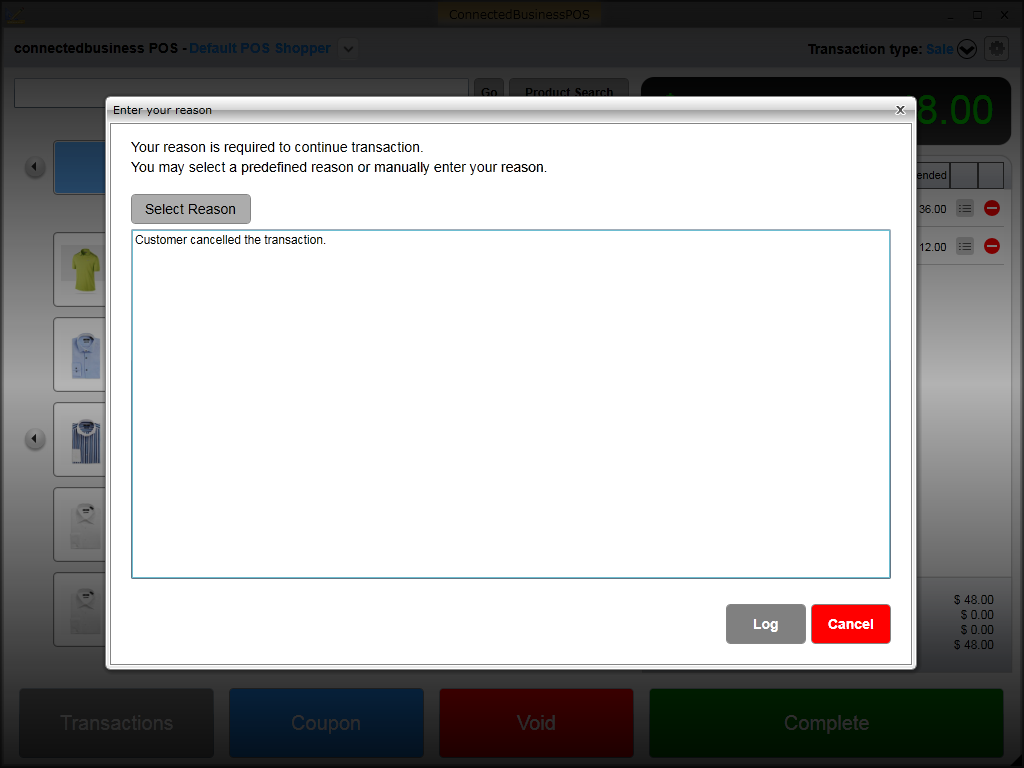
- The Enter your reason window will be displayed. You can manually enter the reason for voiding the transaction or click the Select Reason button if you have predefined reason codes set up in Connected Business. Click Log to save reason details.
Click Image to Enlarge
![]()
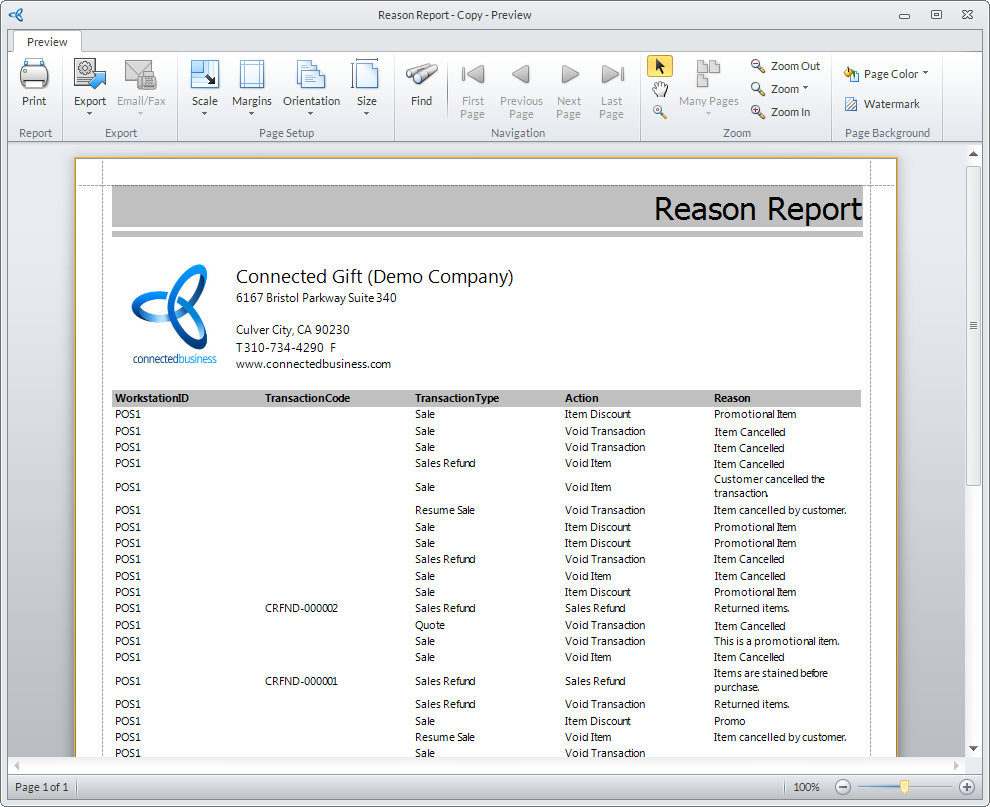
View Reason Log History
To view the reason log history, go to the Report Center of any module in Connected Business. From the Report Center, click Reports > System Reports > POS > General > Reason Report.
Click Image to Enlarge