CRM Follow Up Form
|
Content
|
|---|
The CRM Follow Up Form allows the user to access sales representative-related functionalities in one form.
This menu cascades the usual methods which are typically being used to manage and maintain existing activities from the database. Moreover, this feature serves as a shortcut to bypass in-between steps in the Activity Menu, which have to go through in fulfilling the said tasks.
View Activities From The Follow Up Form
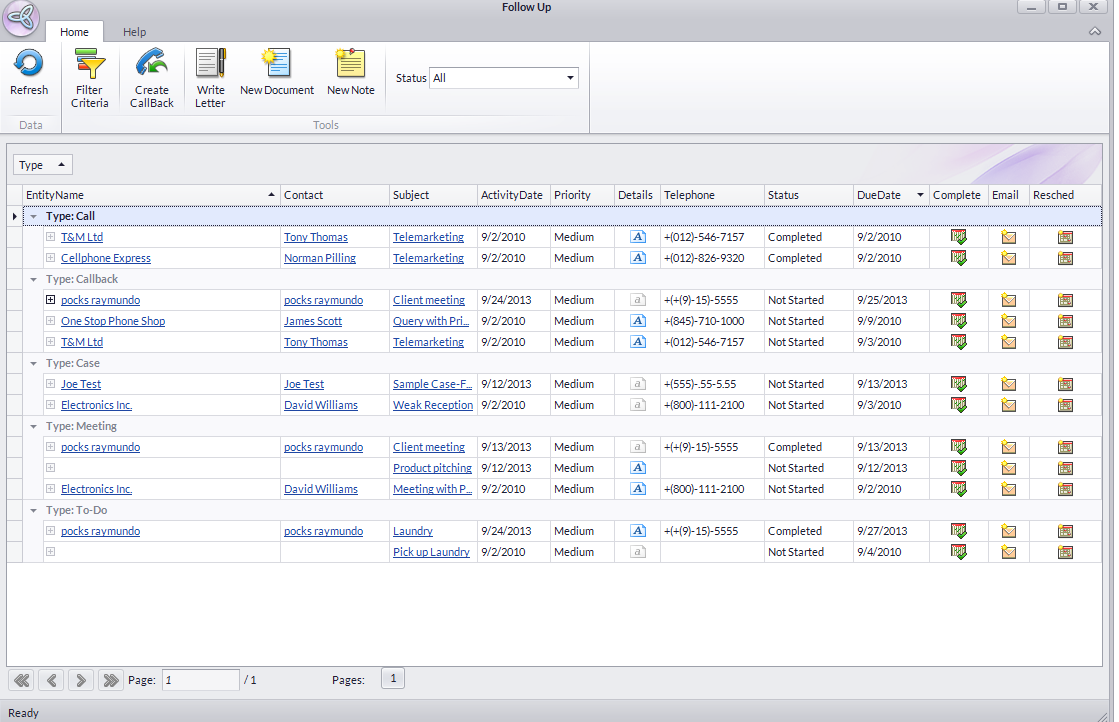
Go to the CRM module > Follow Up to display the list of existing activities that have been created for a specific entity. You can view, access and update the activities as needed.
Click Image to Enlarge
The following table shows the fields found in the form:
| Fields | Description |
| Status Field | Filters the activity list according to the activity's progress state. |
| Entity Name | Displays the entity code based on the assigned Ship To name in the Customer field. |
| Contact | Displays the name of the default contact person of the entity. |
| Subject | The subject line of a specific activity. |
| Activity Date | The date when the activity was created. |
| Priority | Shows the activity’s level of urgency. |
| Details | Specific notes of the said activity. From here users can directly edit/put additional information to make it clearer and more concise. |
| Telephone | Contact number of the entity. |
| Status |
Shows the current status/progress of the activity. |
| Due Date | Displays the deadline of the activity. |
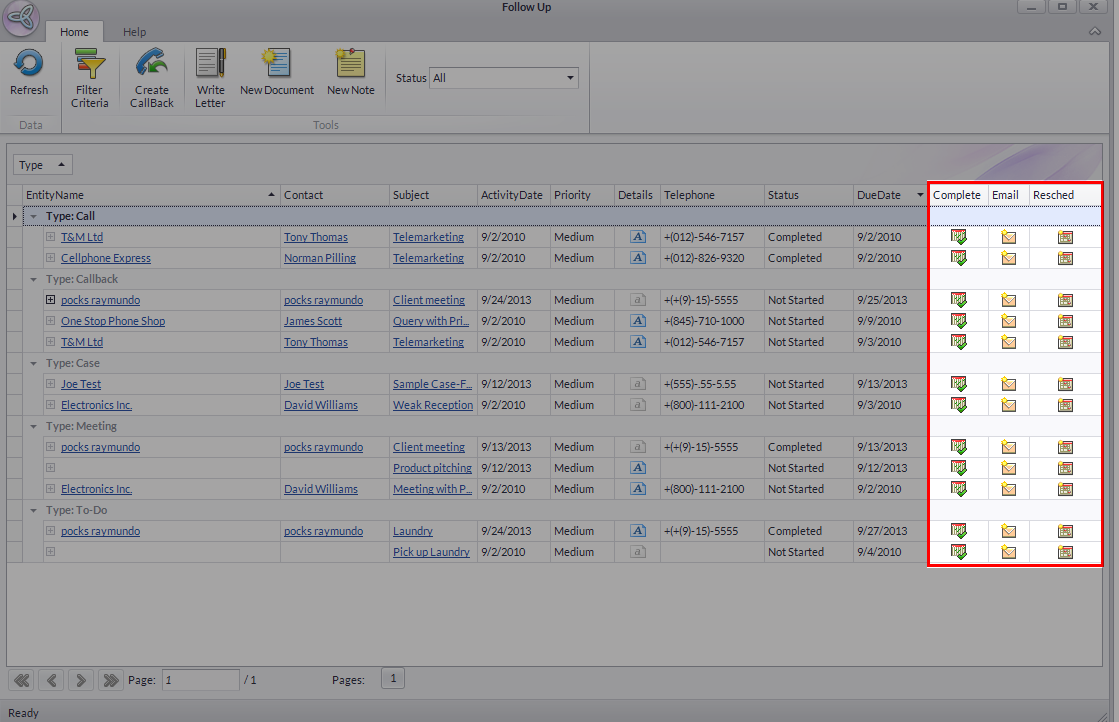
| Complete | Updates the status of the activity to “Completed”. |
| Prompts users to create and send an email. | |
| Resched | Allows users to create, edit and re-schedule an activity. |
Click Image to Enlarge

By clicking one of the icons on the Complete, Email and Resched columns, a task window automatically prompts to seamlessly perform activity updates without the need to switch back to the Activity menu.
![]()
Filter Activities
You can make use of the filter options in the Follow Up form for systemizing your list of activities. This greatly helps you to search, sort and scan the list of existing activities in an efficient and organized manner.

Click Image to Enlarge
In sorting the list of activities in the Follow Up Form, you can either use the Filter Criteria or the Status Field option.
FILTER CRITERIA
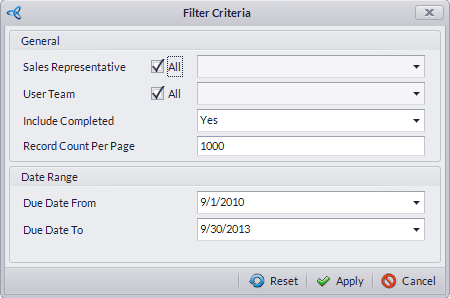
The Filter Criteria uses specific elements correlating to the activities.
Click Image to Enlarge
To sort the activities using the Filter Criteria form, just click the Filter Criteria button. Once the form displays, users may search, filter and sort existing activities from the Follow Up form according to the respective criteria:
| Criteria | Description |
| Sales Representative | Filters the activities based from the assigned Sales Representative. |
| User Team | Filters the activities based on the in-charge teams/departments. |
| Include Completed | Sets the filter to show the activities with “Completed” status, along with the entire activity lists. |
| Due Date From | Assigns the filter’s start date according to the specified Due Date. |
| Due Date To | Assigns the filter’s end date according to the specified Due Date. |
If the Include Completed field is assigned to “No”, the Completed option will be automatically opted out in the Follow Up form’s Status field.
The “All” radio buttons in the General area are marked with check by default. This allows the Filter Criteria to include the entire lists of Sales Representative and User Team on the filter results. Uncheck the buttons to assign the specific Sales Representative and User Team.
STATUS FIELD
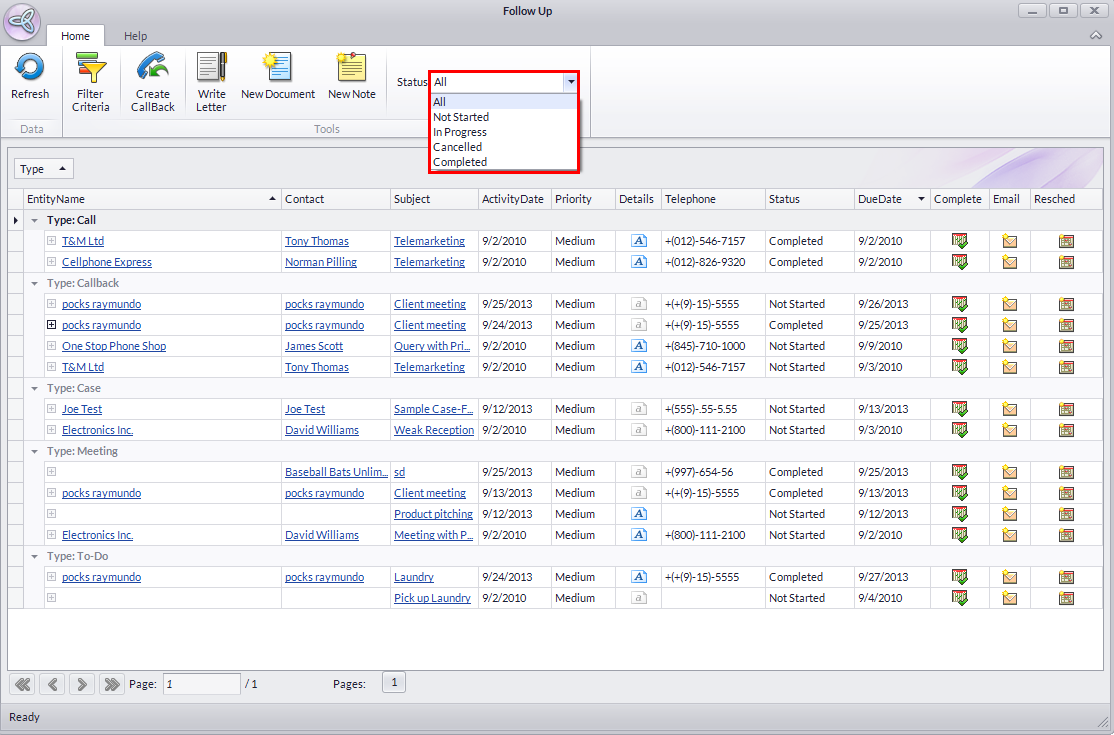
The Status Field sorts out the activities list according to their progress state.
Click Image to Enlarge
![]()
Create Callbacks, Write Letter and Attach Documents or Notes
The Follow Up form is designed not just for viewing existing activities on the database. It is also fitted with dedicated menus to perform follow up tasks such as creating callbacks, writing business letters and/or memos, attaching documents and creating notes.
CREATE CALLBACK
- From the Follow Up form, select a specific Entity Name on the list. In this case, we will be assigning a callback to Joe Test.
- Click the Create CallBack icon to display the Create CallBack form.
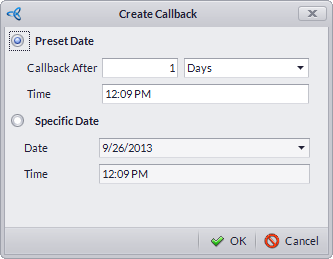
Click Image to Enlarge
- Set the callback date according to the preferred time and date.
- Click OK then Refresh the Follow Up form to apply changes. Notice that the status of the activity has been changed to “Completed”, as it has been duplicated and assigned as “Not Started" in the Callback section of the list.
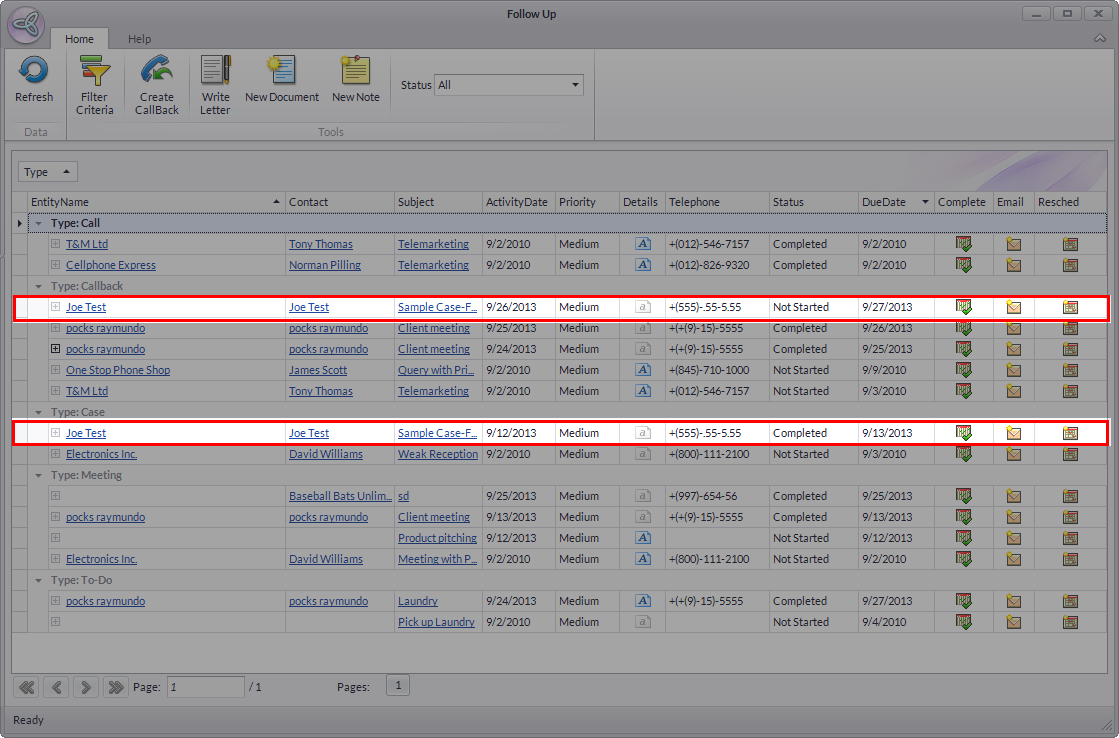
Click Image to Enlarge
WRITE LETTER
- From the Follow Up form, select a specific Entity Name on the list.
- Click the Write Letter icon to display the Document Editor.
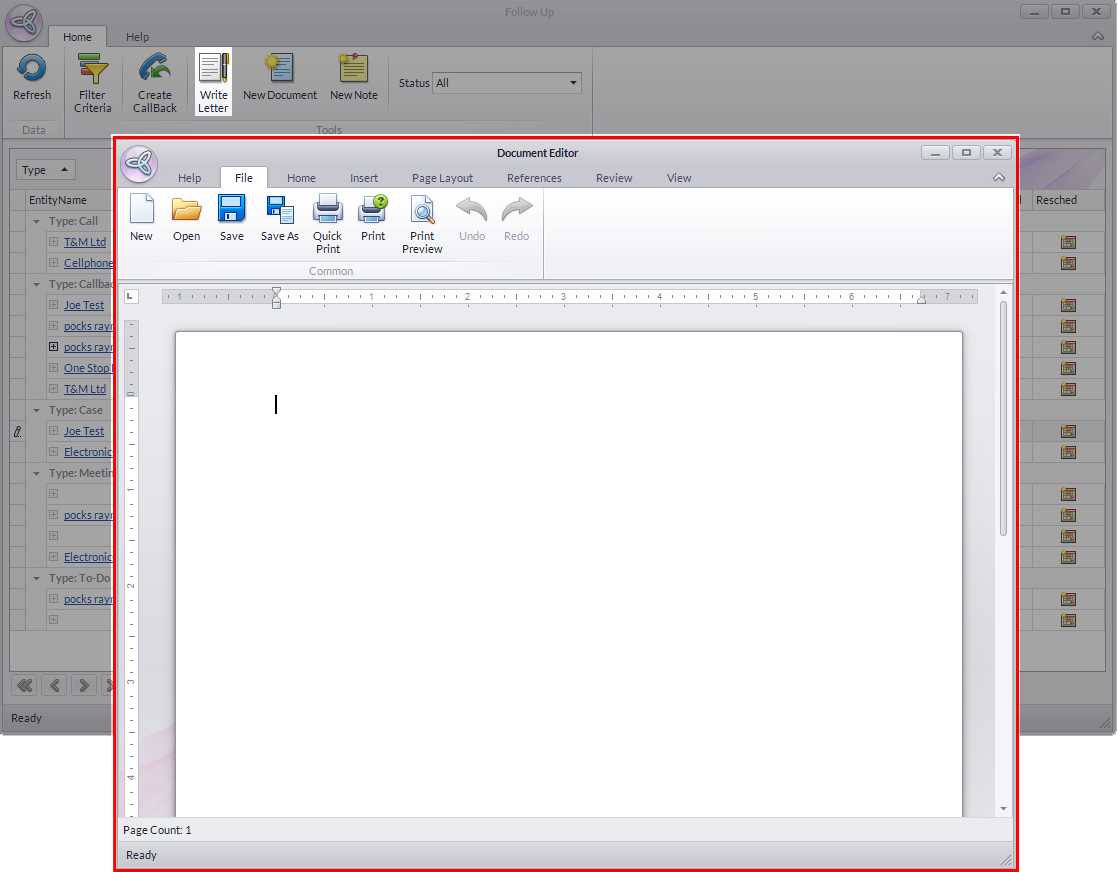
Click Image to Enlarge
- Compose the word document then click Save.
You can also save the document to your local drive by clicking the Save As button.
ATTACH DOCUMENTS

Click Image to Enlarge
- To access and attach documents from the database, select a specific Entity Name on the list. We’re going to select Joe Test for this demO.
- Click the New Document icon.
Click Image to Enlarge
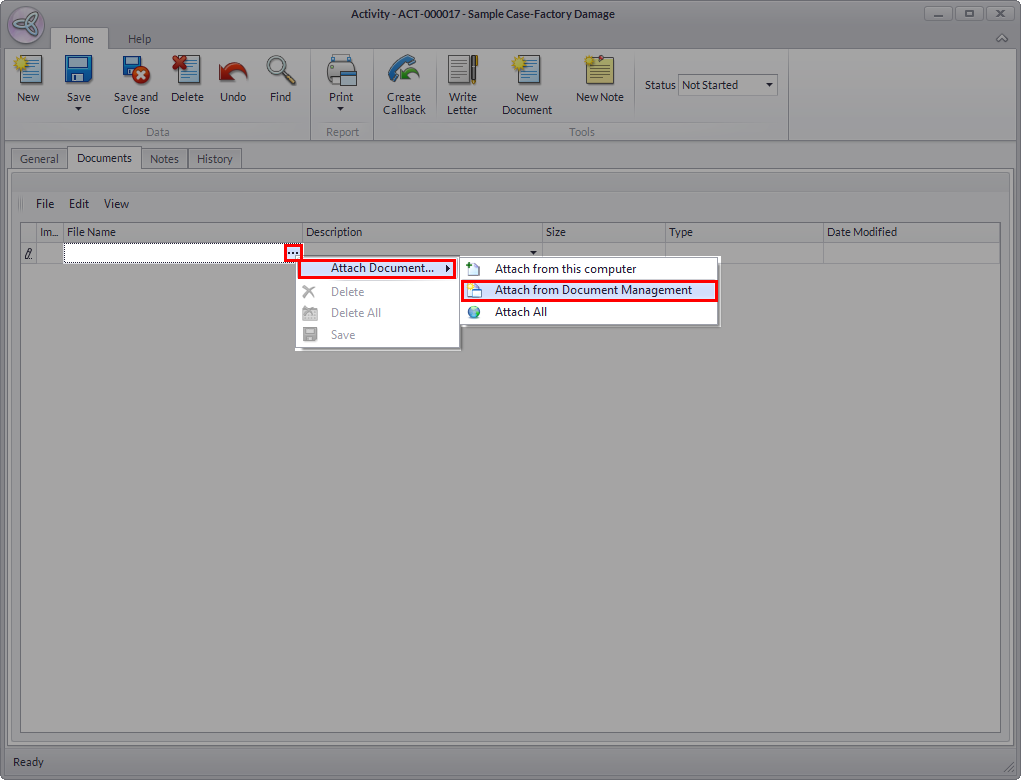
- Click the ellipsis > Attach Document > Attach from Document Management.
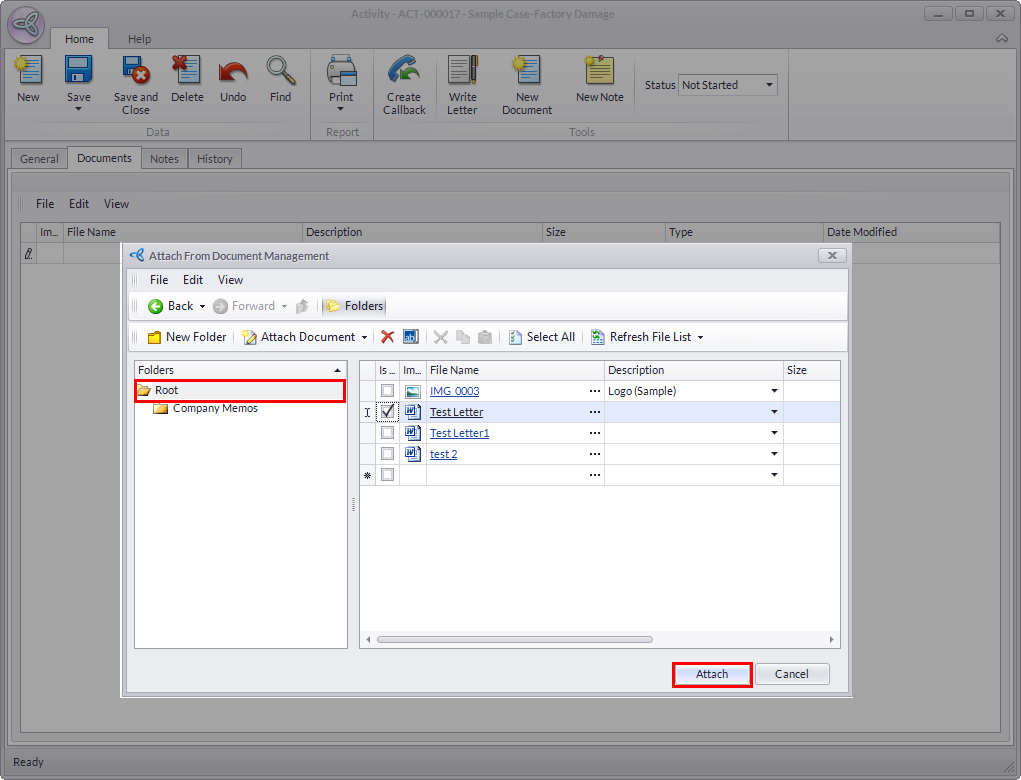
Click Image to Enlarge
- Click on the Root folder to view the saved file.
- Tick the checkbox of the document/s then click Attach.
- Click the Refresh button on top left corner of the form to apply changes.
- From here, the attached files can now be viewed by dropping down the details from the Entity Name.
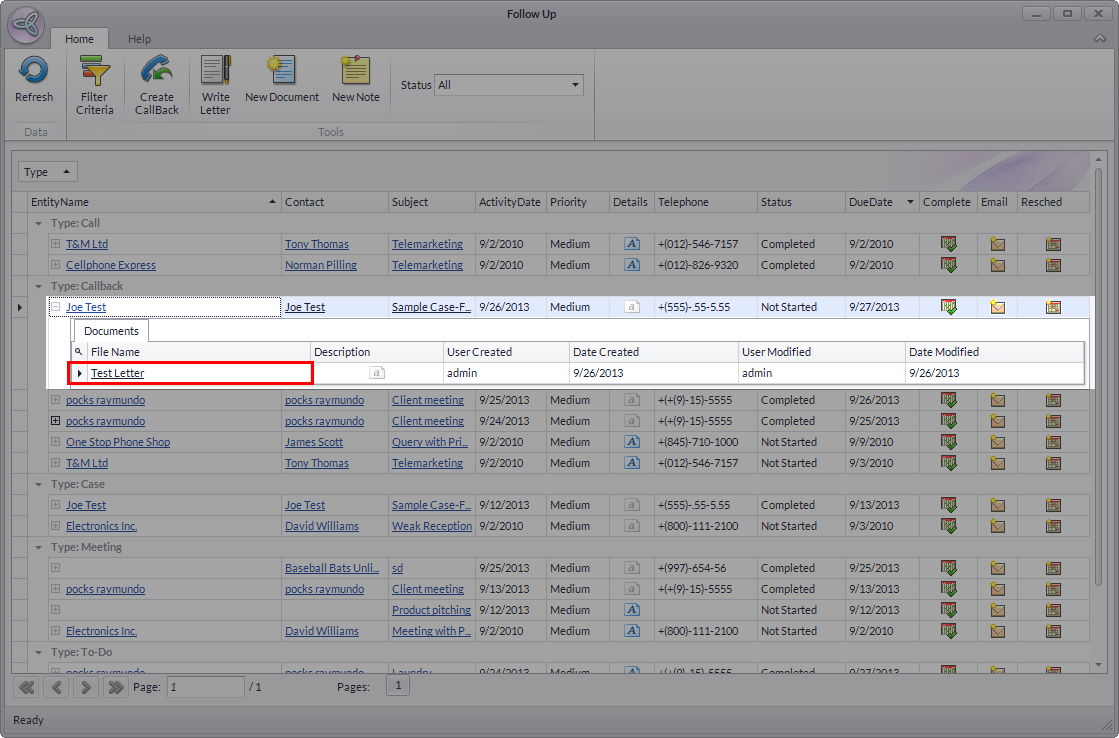
Click Image to Enlarge
You can also attach files from your Local Drive by selecting Attach Files > Attach from this Computer.
CREATE NEW NOTE
- From the Follow Up form, select a specific Entity Name on the list. We will be using Joe Test again as our Entity.
- Click the New Note icon.
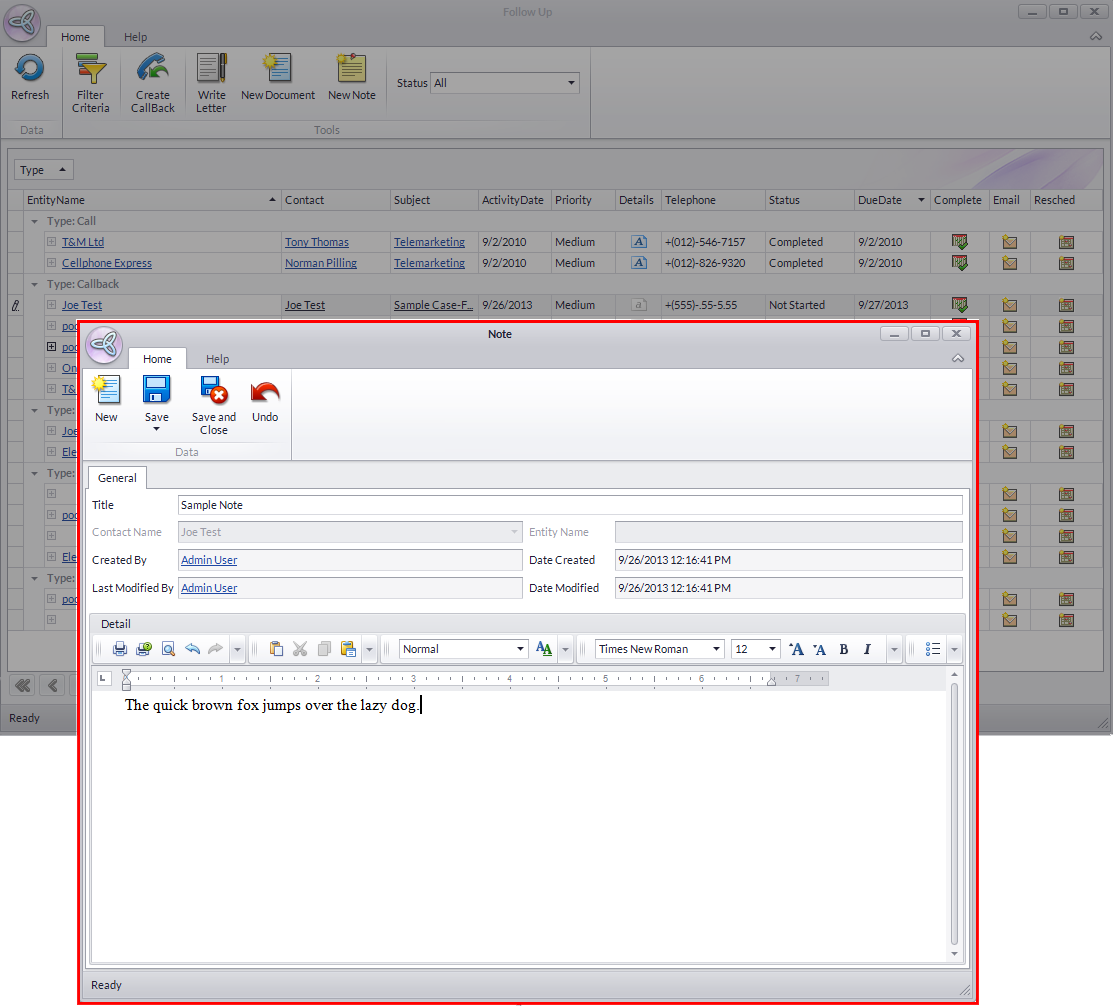
Click Image to Enlarge
- Create and modify as much details as applicable.
- Click Save and Close then Refresh the Follow Up form to apply changes.
- From here, the attached note can now be accessed by dropping down the details from the Entity Name.
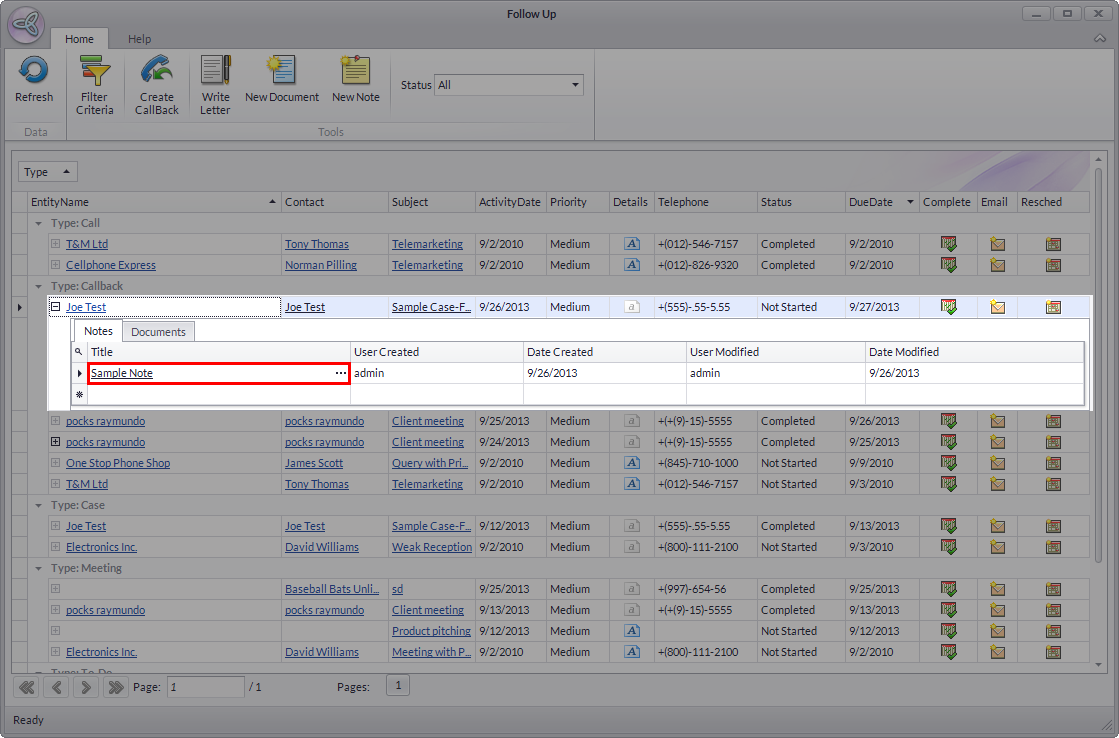
Click Image to Enlarge
![]()