Maintain Accounting Module Setup and Preferences
| Content |
|---|
Accounting Preferences let’s you apply your preferred settings for the account code analysis. Other accounting setup, such as the account segments, account sub groups and the budget split table, are also discussed in this page.
Decide on the source of accounts you want to keep. You may still change the default source however; the analysis for the accounts would start from the date when you changed the source of accounts making it difficult to make historical comparisons.
Configure Accounting Module Preferences
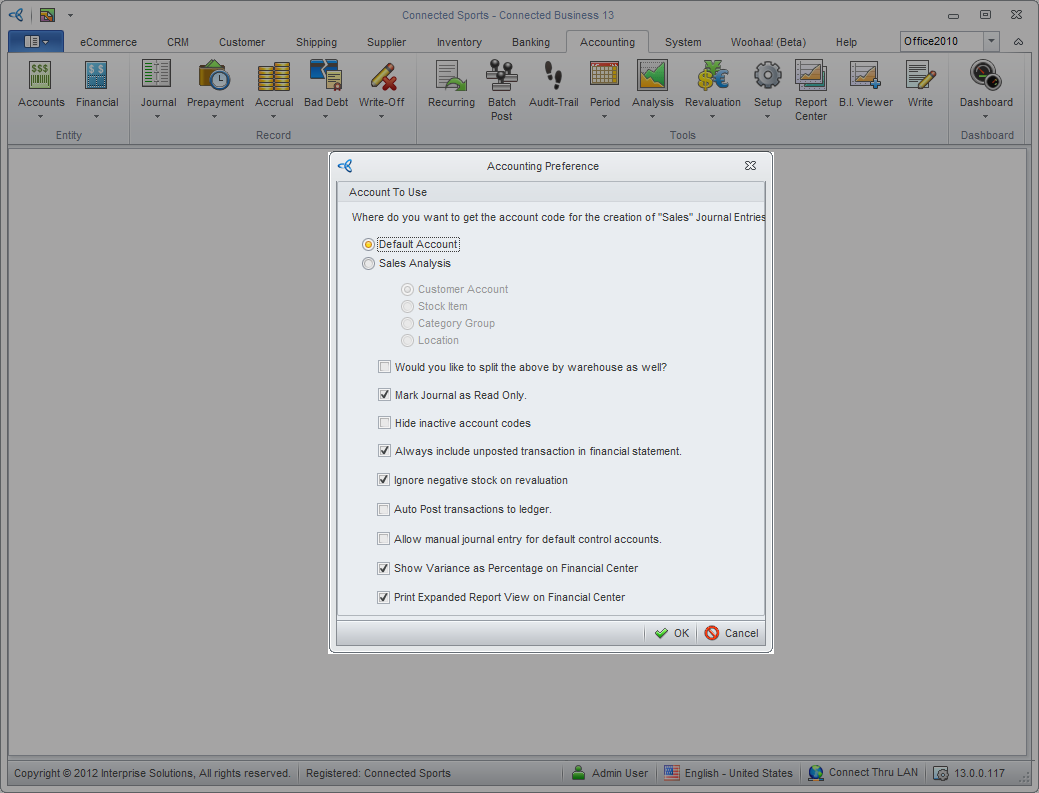
From the Accounting Preferences screen of the New Company Wizard, click on the Edit button. Or, from the Accounting Module, select Setup > Preferences. The Accounting Preferences form will display.
Click Image to Enlarge
Select where you want to get the account code analysis or where you will base your accounts analysis from by referring to the following table.
| Field | Description | |
| Default Account | The account analysis would be based on the Default Accounts. | |
| Sales Analysis (Select where the sales analysis will be based on.) | Customer | The account analysis would be based on customers. Make sure that the Customer GL Class templates are properly set up. |
| Stock Item | The account analysis would be based on per inventory item. Make sure that the Inventory GL Class Templates are properly set up. | |
| Category Group | The account analysis would be based on Inventory Item Categories. Make sure that the account setup in the inventory categories are properly setup. | |
| Location | The account analysis would be based on the item Location. | |
| Would you like to split the above by warehouse as well? | This option is available for both Default Accounts and Sales Analysis. This option refines the analysis by splitting the analysis selected per active warehouse.Refer to the image below. | |
| Mark Journal as read only? | This option marks the journal entries as Read Only. |
|
| Hide Inactive Account Codes | This option hides all inactive account codes. | |
| Always Include Unposted Transaction in Financial Statement | This option will include all unposted transactions in the financial statement. |
|
| Ignore Negative Stock on Revaluation | This option, if enabled, will allow you to ignore negative stocks when revaluating inventory items. | |
| Auto Post Transactions to Ledger | Allows you to automatically post all transactions to the current period and directly to the General Ledger. | |
| Allow Manual Journal Entry for Default Control Accounts | This option restricts users from creating manual entry to GL accounts being used by the system to generate journal. Upon upgrade from Interprise Suite 6 to Connected Business 13, the Allow manual journal entry to default control accounts is disabled in the Accounting preferences. * If checked – allows you from creating manual journals using the Default Accounts. However, the system will only compute the totals created from the transactions forms. In effect, it will not allow you to compare your financial statements to your reports as the totals may no longer match. * If unchecked – it will not allow you from creating manual journals using the Default Accounts. |
|
| Show Variance as Percentage on Financial Center | This option will allow you to perform variance analysis on your financial statements based from percent variance on any fiscal period. | |
| Print Expanded Report View on Financial Center | This option will allow you to print expanded views on financial reports such as included account codes. | |
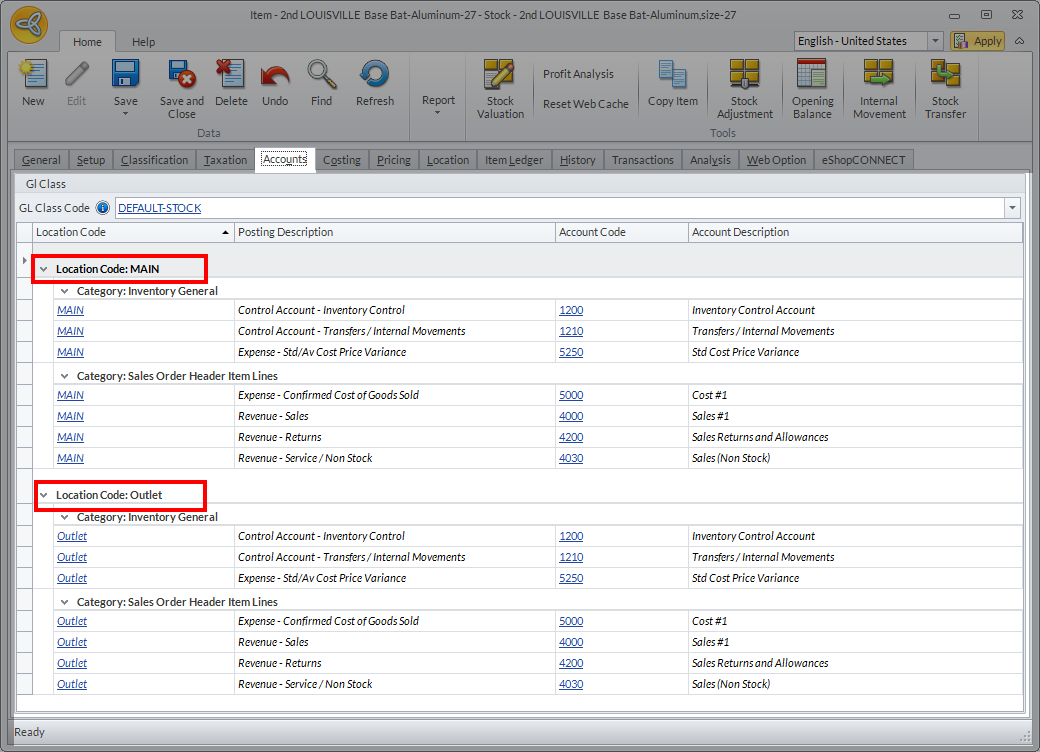
Suppose you select the stock item under the Sales Analysis,you can see that the locations are split into different locations.
Click Image to Enlarge
![]()
Account Segments
Account Segments are used to sub analyze accounts according to segments in the business e.g. department or location. The following steps demonstrate how to set up or modify account segments.To modify the account segments,
Step 1: Open the Account Segments Wizard
Go to Accounting module > Setup > Account Segments. The Account Segment Wizard will be displayed. Click Next to proceed.
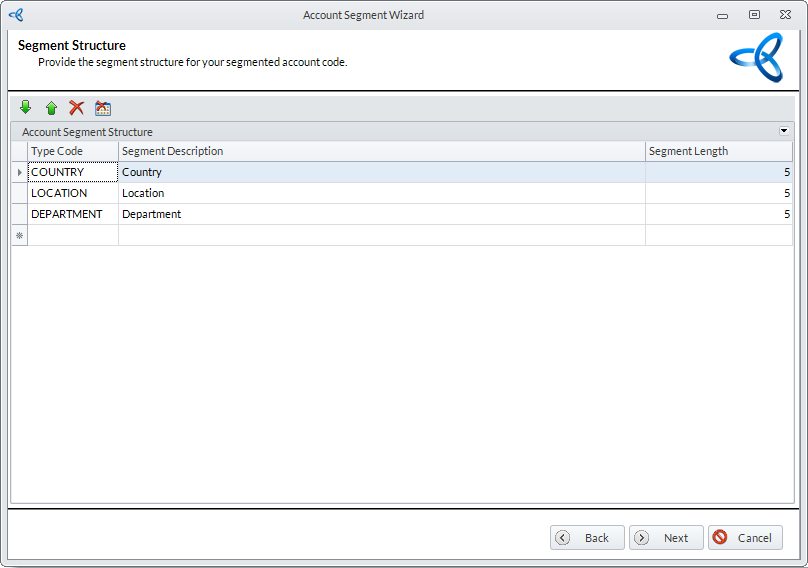
Step 2: Modify Default or Add New Account Segments
You will find the default account segments for Country, Location and Department. You may modify the default segments or add new ones. You can also change the sort order of the segments by clicking on the Up or Down arrow buttons. You can delete the segments by clicking the Delete button.Click Nextbutton to continue.
Click Image to Enlarge
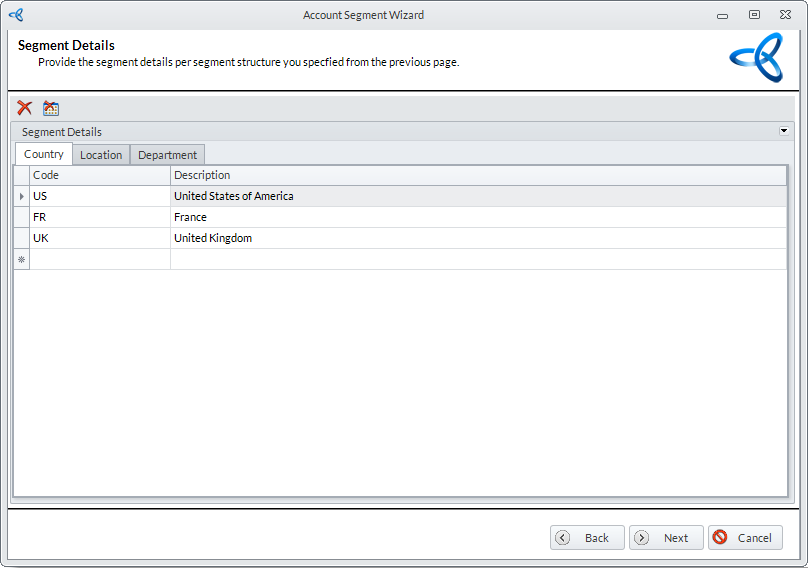
Step 3: Enter Segment Details
In the Segment Details screen, enter the segment values for each segment type. Provide the Segment Code and Description for each segment value. Click Next button to continue.

Keep the segment codes short as each segment would consume the maximum 30 character limit (including the account code, segment code and separator) for the segmented account code length.
Click Image to Enlarge
Step 4: Select Segment Combinations
This step allows you to select the segment combinations that actually go together so you won't end up with invalid account codes. Select segment combinations by clicking on the checkbox next to the segment value. Click Next and Finish to generate the account segments.
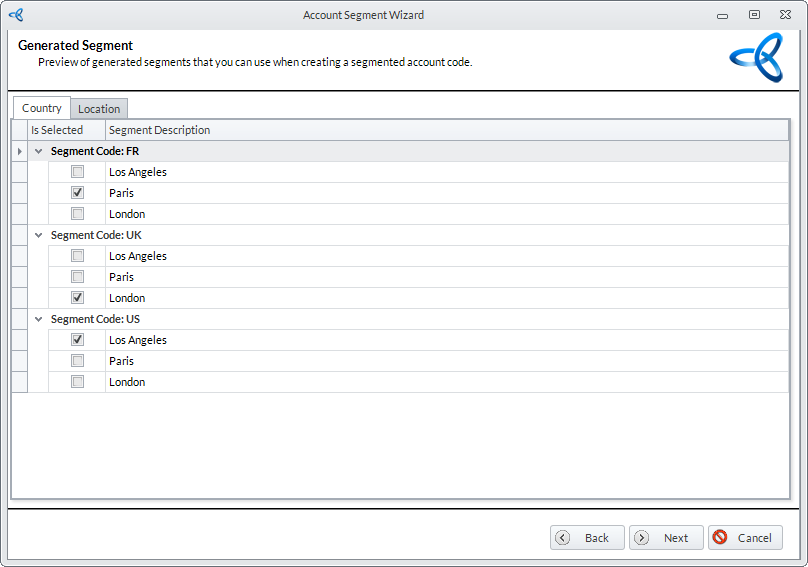
Click Image to Enlarge
![]()
Account Sub Groups
Account Sub Groups allow you to group account types that are associated with one another. To create a new sub account group,
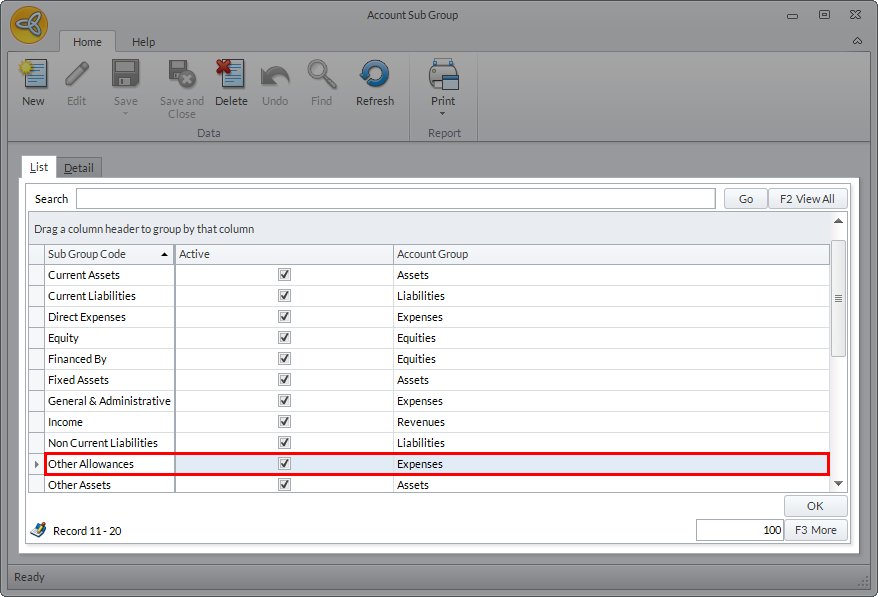
- Go to Accounting module > Setup > Account Sub Groups. The Account Sub Group form will be displayed.
Click Image to Enlarge
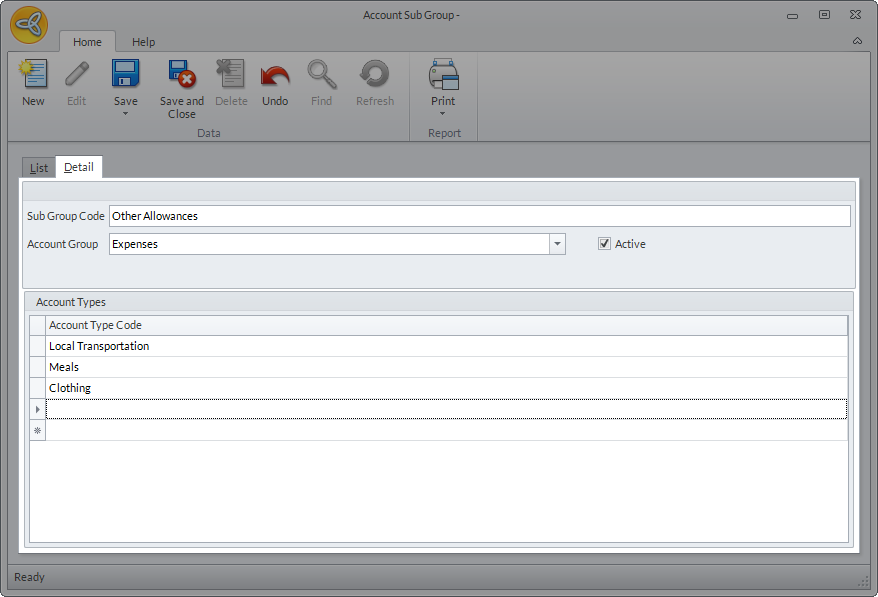
- Click New from the menu and enter the details for the new account sub group such as the Sub Group Code and Account Group.
- In the Account Types section, enter the account types to be included in the account sub group. Use the arrow down key to add a new line.
Click Image to Enlarge
- Tick the Active checkbox to include the account sub group in the Account Sub Group list.
![]()
Budget Split Table
Budget Split Tables allocate the percent values across the accounting fiscal period. This is ideal for seasonal businesses. To create a new budget split table,
- Go to Accounting module > Setup > Budget Split Table. The Budget Split Table form will be displayed.
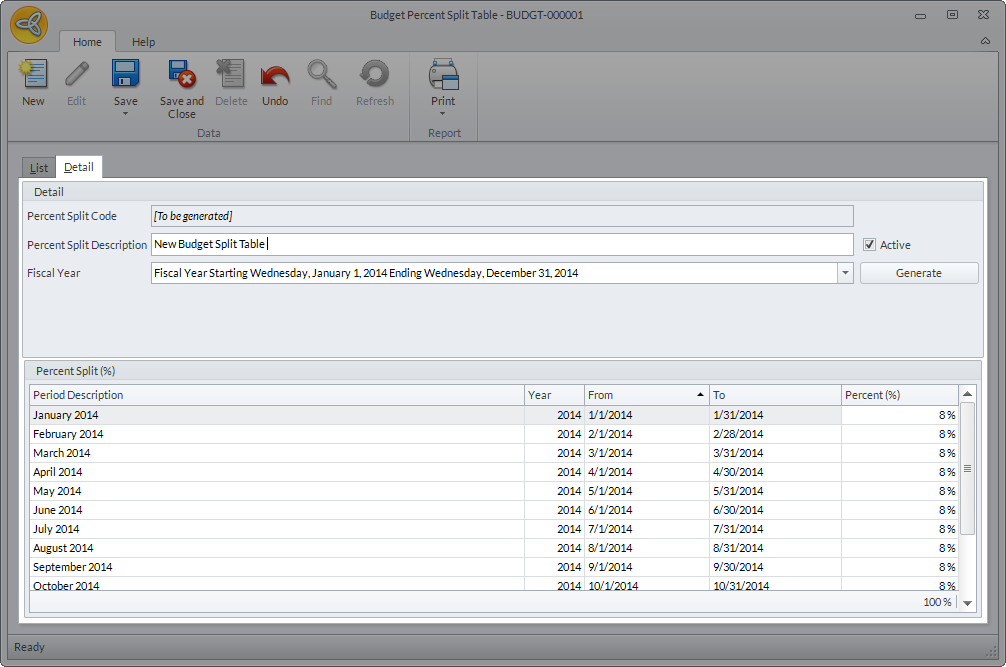
- Click New from the menu and enter the table details for the Percent Split Description.
- Select the fiscal year where the budget split table will be applied. The Percent Split (%) section will be auto-populated with the accounting periods for the fiscal year selected.
Click Image to Enlarge
- Specify the budget percent allotted for each period in the Percent (%) column. The values must sum up to 100% otherwise the table will not be saved.
- Click Save and close to save the budget split table.
![]()