Design Reports
Report Designing is the action of creating a document to present information. In Connected Business, this process revolves around the Report Center where the all the necessary design tools, settings, and options are available. These provide an easy way to either modify the content of an existing report or design one using a pre-existing template.
This article will discuss the basics behind designing reports in the Report Center.
Access Design Options
To access the design options and settings,
- Go to the Report Center from any module. Select a report from the Report Explorer pane and click Edit to reveal the Report Ribbon Menu items. Alternatively, simply click New.
- Click Design to access the Design Options.
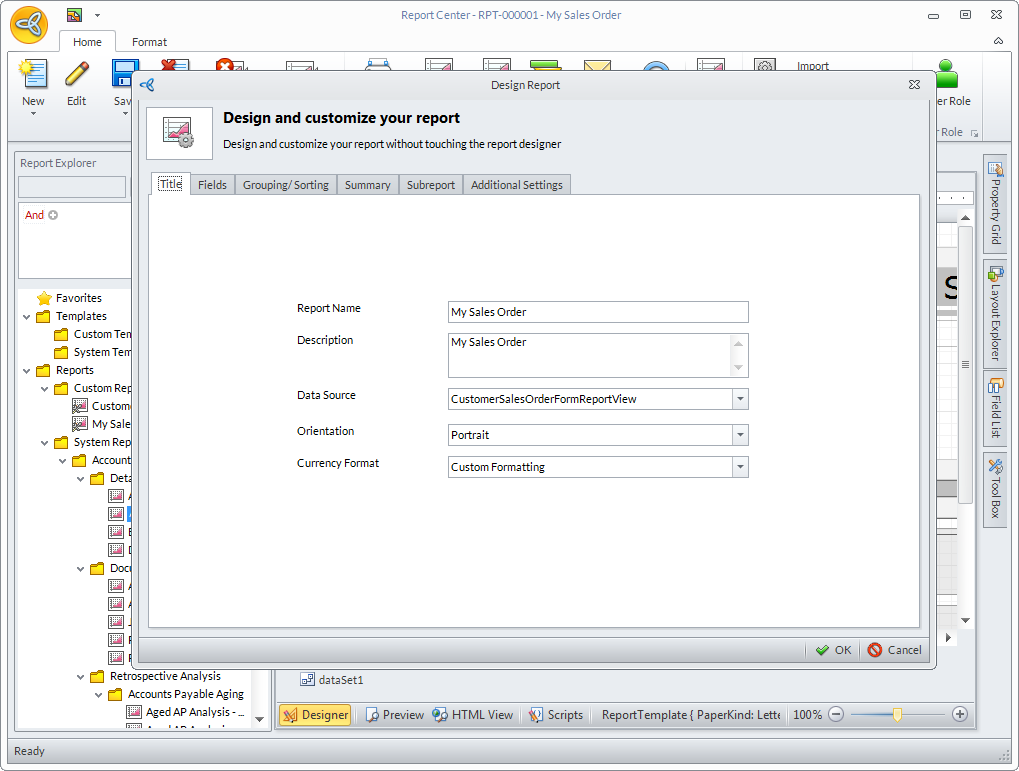
In Connected Business v13, clicking Design will display the Design Report form, which has multiple tabs.
Click Image to Enlarge
The various tabs are as follows:
- TITLE
Here, you can modify the following fields:
Field Name Description Report Name Allows the user to set the name of the report. Description Allows the user to enter a short description about the report. Data Source Allows the user to attach a Data Source to the report. Orientation Allows the user to set how the report is displayed and printed. Available options are either Portrait or Landscape. Currency Format Formats the currencies to be used with the report. Choices available are:
- Custom Formatting (currency format is user-provided)
- System Formatting (currency format based on Connnected Business settings)
- FIELDS

Click Image to Enlarge
On this tab, you can do the following:
- Add or modify fields by adding or removing fields.
- Add calculated field by clicking on the Add Calculated Fields button.
- Click on the Apply Formatting button to modify the format of the data fields.
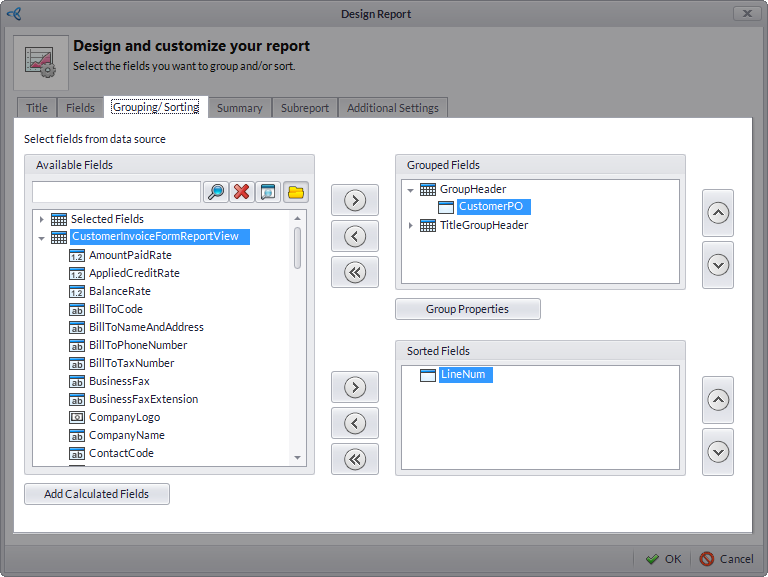
- GROUP/SORTING
Click Image to Enlarge
Here, you can Group data fields into the standard group header. Please refer to the Create a new report from scratch documentation to know more.
The fields present are as follows:
Field Name Description Available Fields This displays the Selected Fields, Calculated Fields and Column Fields of the selected report data source. Grouped Fields Displays the collection of fields used as a criteria for creating groups in a report. Group Properties Allows you to set the group header band properties for a group of data. The Group Properties window will display when you click on the Group Properties button.
Group Union - indicates how a group header band and its group are split across the pages. You may select the following options as: None, Whole Page or First Detail.
Page Break - Allows you where to set a break relative to the selected band. You may select the options: None,Before the Band, After the Band.
Keep Together - specifies whether a band can be split across the page.
Repeat Every Page - specifies whether the group band should be shown only on the first page that the group appears on or on every page that the group is printed on.
Sorted Fields Displays the list of sorted fields. - SUMMARY
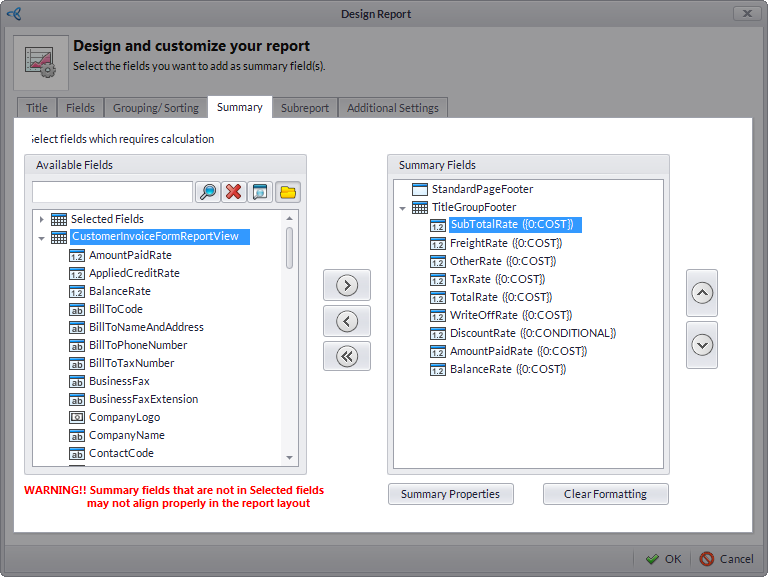
Click Image to Enlarge
On this tab, you can select the fields you want to add as summary fields. You can also add summary fields to a report that requires calculation.
To add summary fields,
- Select the column fields from the available fields section that you want to add on the summary of the report.
- Click on (
 ) button to add the selected fields on the Summary Fields section. Alternately, click on (
 ) button to remove the selected field or (
 ) to remove all selected fields.
- Click on the Summary Properties button. The Main Form window will be displayed. Click Ok to apply the changes.
- Select the column fields from the available fields section that you want to add on the summary of the report.
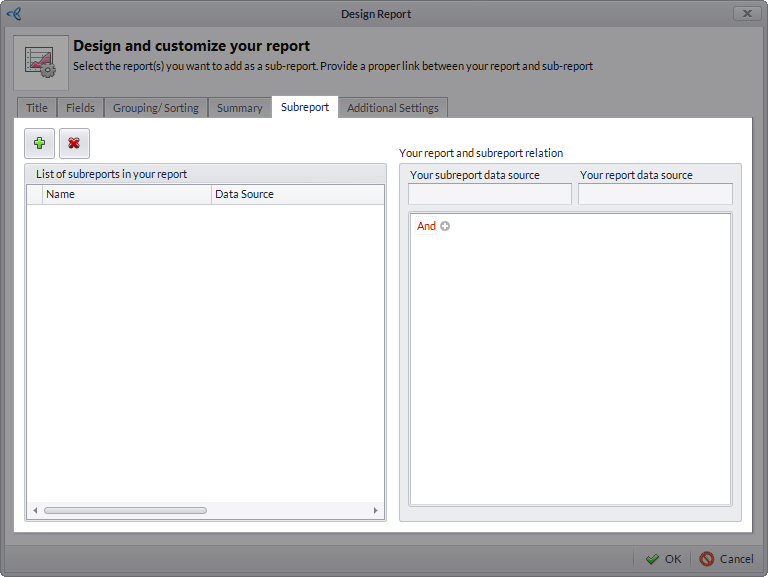
- SUBREPORT
Click Image to Enlarge
Select a specific report to be added within the main report. Please refer to Add Subreport documentation for more information.
To add a subreport,
- Click the (
 ) button. The Subreport Source form will be displayed.
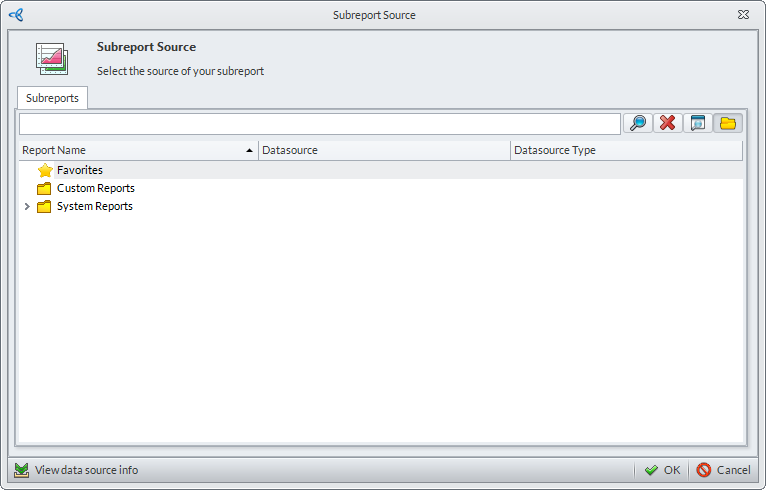
Click Image to Enlarge
- Select a report and click OK.
- To remove a subreport, click the (
 ) button on the Subreport Form.
- Click the (
- ADDITIONAL SETTINGS
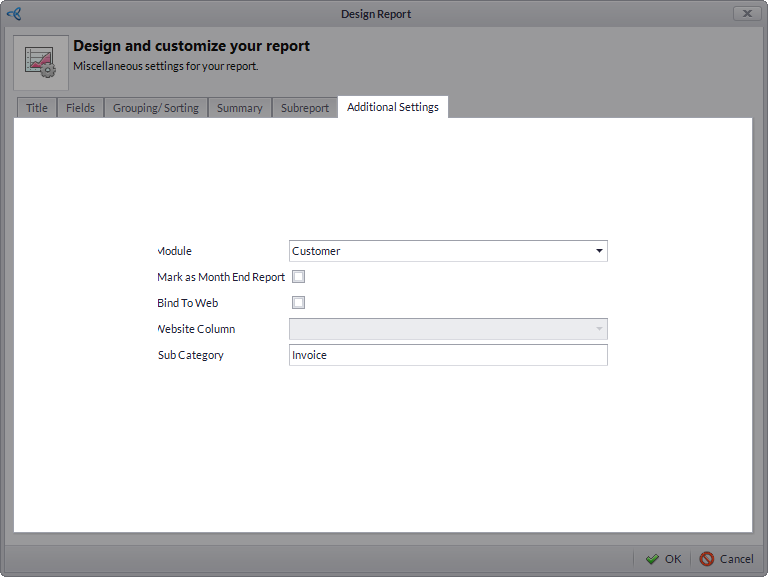
Click Image to Enlarge
On this tab, you can modify report information by changing the following fields:
Field Name Description Module Select which module the report will be used. Mark As Month End Report Indicates that the report is a month end report. Bind to Web Indicates that the report will be used in the eCommerce. Website Column Indicates if a column is created from a website. Sub Category Add a sub category to the report.
In Connected Business v14 is a Design button which opens a dropdown menu from which the user can open the specialized individual forms.
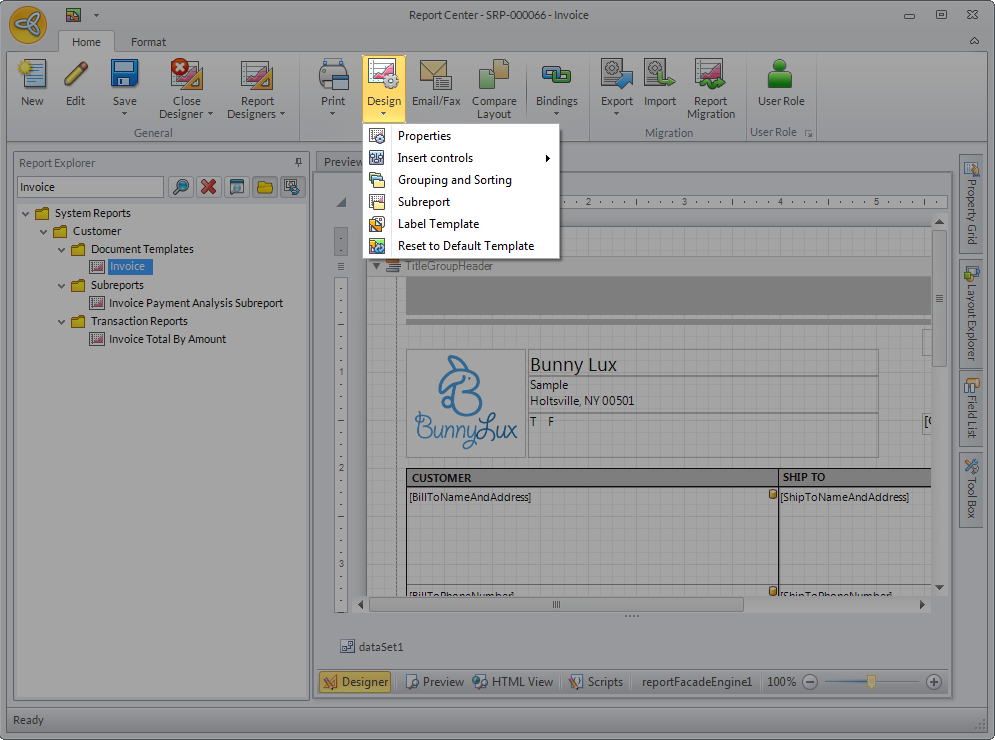
Click Image to Enlarge
The available options are as follows:
- PROPERTIES
Clicking this opens the Report Properties form. It is here you can set the general and additional properties of the report.
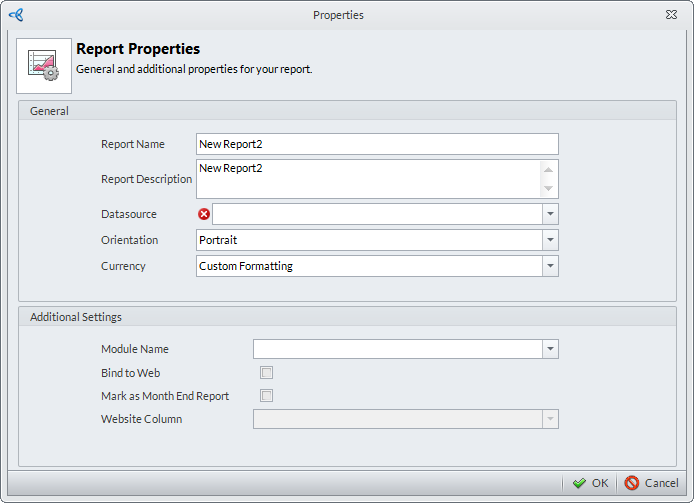
Click Image to Enlarge
The fields available are as follows:
Field Name Description Report Name Allows the user to set the name of the report. Report Description Allows the user to enter a short description about the report. Data Source Allows the user to attach a Data Source to the report. Orientation Allows the user to set how the report is displayed and printed. Available options are either Portrait or Landscape. Currency Formats the currencies to be used with the report. Choices available are: - Custom Formatting (currency format is user-provided)
- System Formatting (currency format based on Connnected Business settings)
Module Name Allows the user to select which module to be used. Bind to Web If ticked, enables the report to be used in the eCommerce site. Mark as Month End Report If ticked, designates the report as a month end report. Website Column Indicates the presence of a column created from a website. - INSERT CONTROLS
This provides the user with the ability to insert any or all of the following objects into a report:
- Company Information Label - Clicking this opens the Company Info Labelform. From there, the user can select which labels to add. Available labels are:
- Report Title
- Company Logo
- Company Name
- Company Address
- Company Phone and Website
- Document Code Label - This allows the user to set the report’s primary identifier.
- Table - Clicking this opens the Design Table form. Here, the user can select which from the available fields to be displayed and the appearance of the table layout.
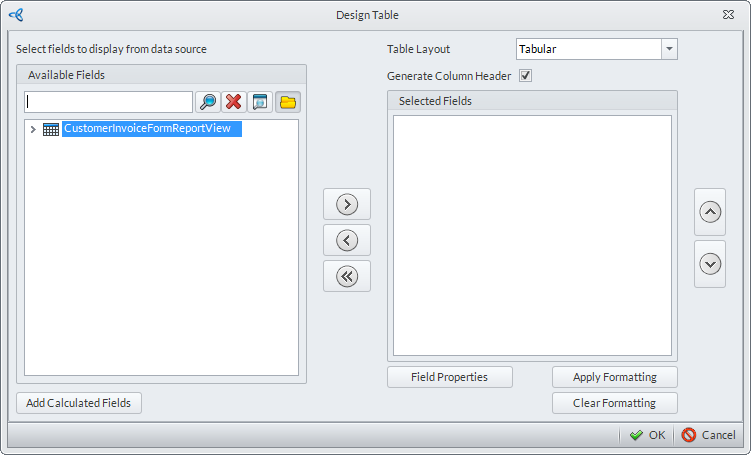
Click Image to Enlarge
- Field Label - This enables the user to set the Field Properties of a report.
- Barcode Label - This enables the user to set the properties of a report’s barcode.

Without an attached Data Source, only the Company Information Label may be inserted.
- Company Information Label - Clicking this opens the Company Info Labelform. From there, the user can select which labels to add. Available labels are:
- GROUPING AND SORTING
Clicking this opens the Grouping and Sorting form. This allows the user to select data fields from the available list and group them into standard group headers. See Create a new report from scratch for more information.
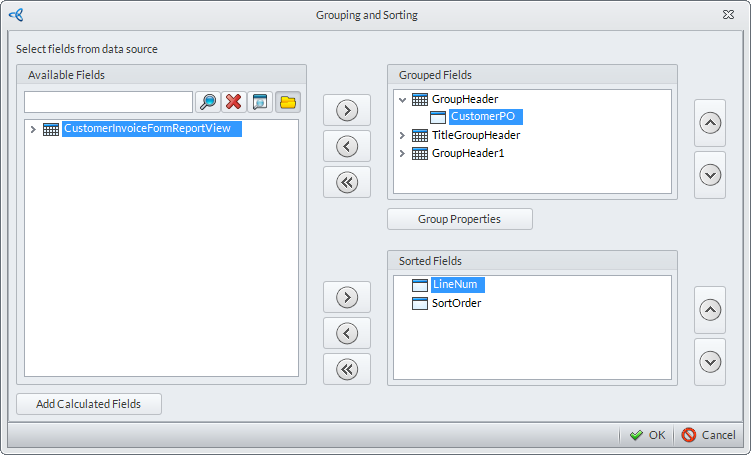
Click Image to Enlarge
This feature is not accessible if there is no Data Source attached to the report.
- SUBREPORT
This feature allows the user to select and add a specific report within another report. See the Add Subreport documentation for more information.
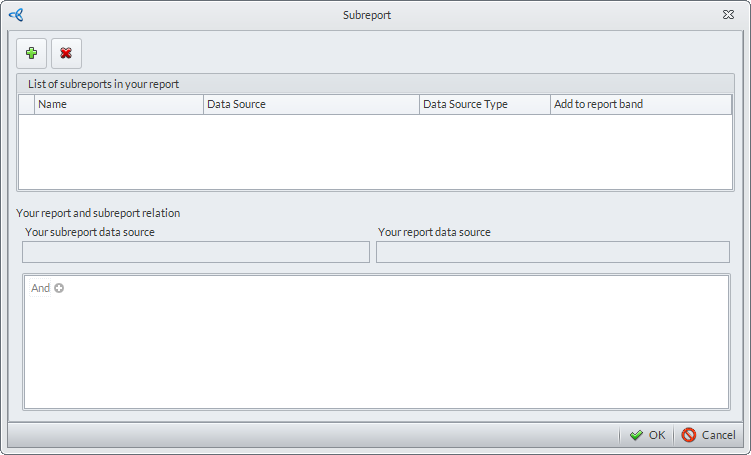
Click Image to Enlarge
To add a subreport,
- Click the () button. The Subreport Source form will be displayed.
Click Image to Enlarge
- Select a report and click OK.
- To remove a subreport, click the () button on the Subreport Form.
- Click the (
- TITLE
- LABEL TEMPLATE
This will open the Report Template Chooser form. From here the Label Report Options can be set. Click Select to accept and apply the settings.
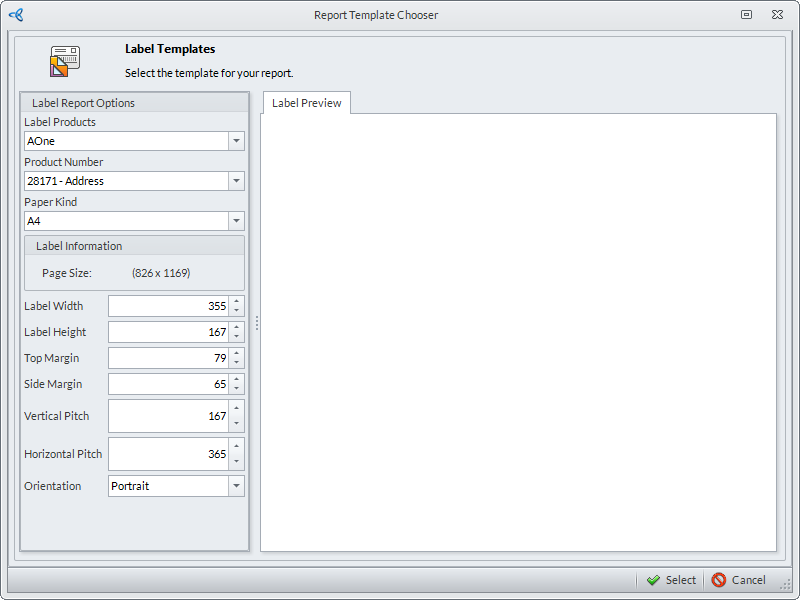
Click Image to Enlarge
- RESET TO DEFAULT TEMPLATE
Clicking this will undo any modification and setting of the report and revert it to a default template.
![]()
Enhancements
Previously, there were more options and procedures than necessary for the user to work with. All in all, complications like these made designing a report a time-consuming and tedious task.
In Connected Business v14, the process has been streamlined with fewer procedures and options. The new straight-forward and versatile approach makes designing a report on Connected Business quick and easy, as will be discussed in this article.
Create a New Report Design
In Connected Business v13, when clicking the New button to create a design, the user is presented with multiple template choices.
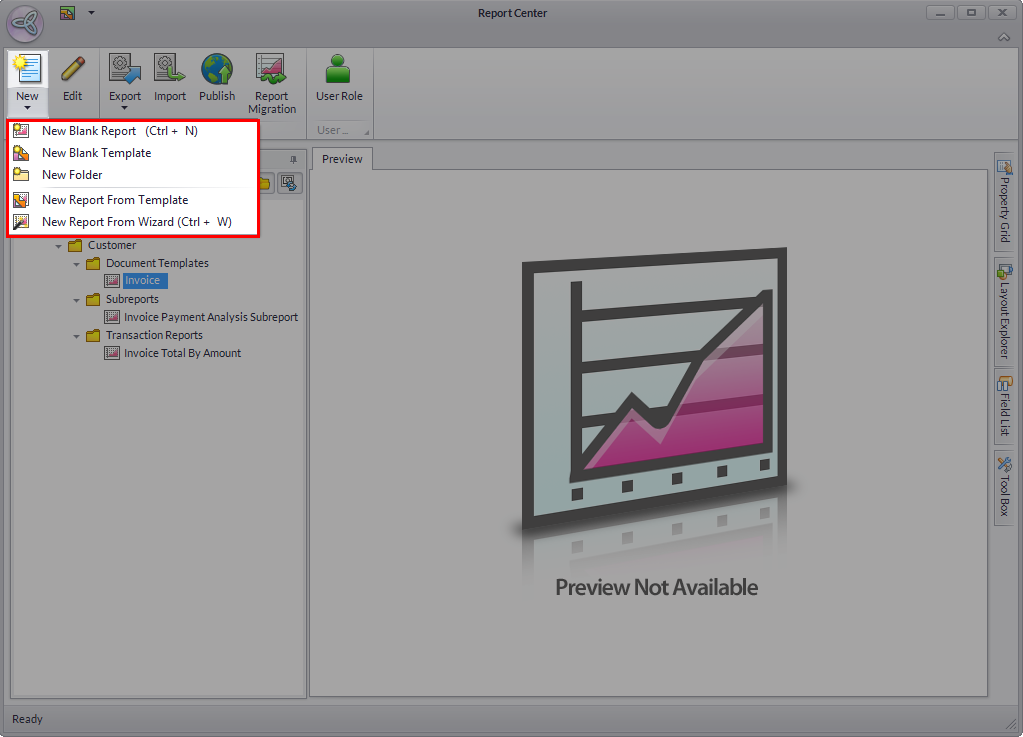
Click Image to Enlarge
Now, in Connected Business v14, the drop down menu has been removed. Clicking New will load a general report template, instead of multiple templates, that can be adapted and modified to suit your business needs.
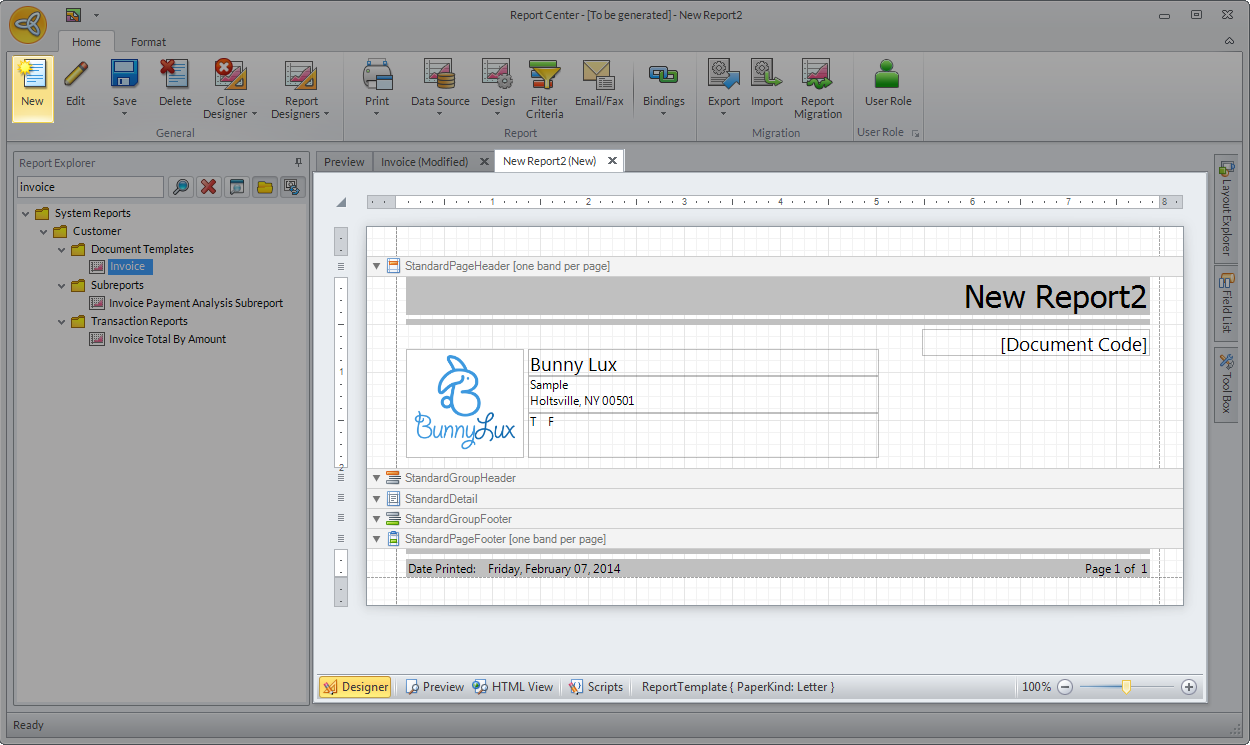
Click Image to Enlarge
Edit Parameter
In Connected Business v13, right-clicking the Parameters entry in the Field List fly out panel allows you to edit the parameter properties of the merged fields in the report.
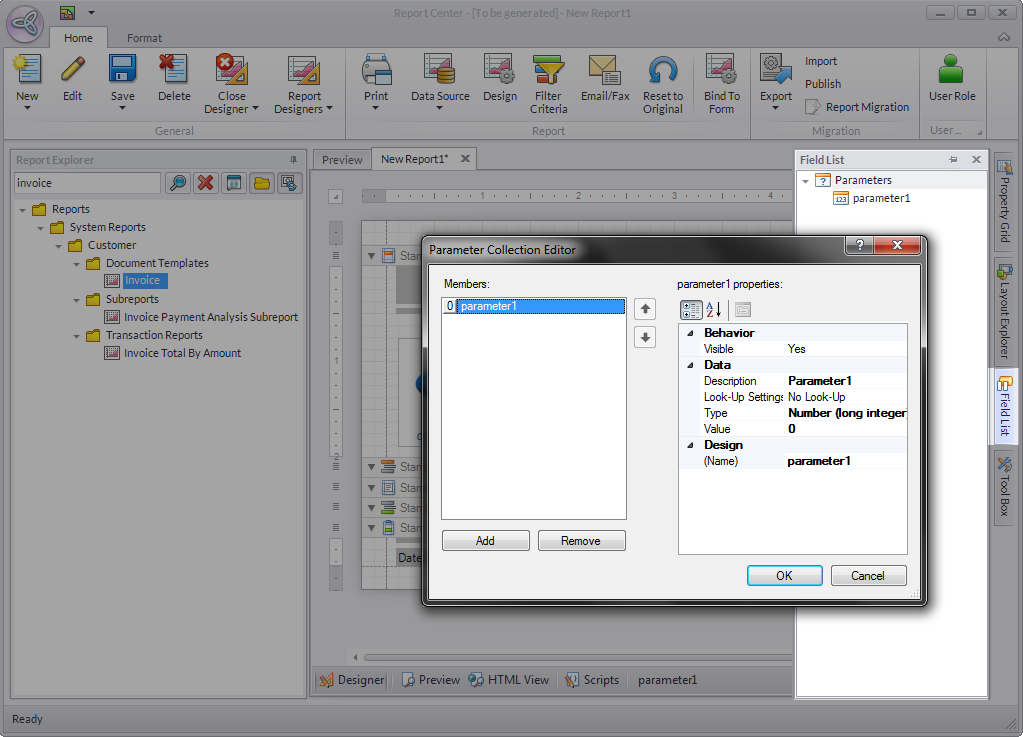
Click Image to Enlarge
However, this function can also be done in the Property Grid fly out panel, which makes it redundant.
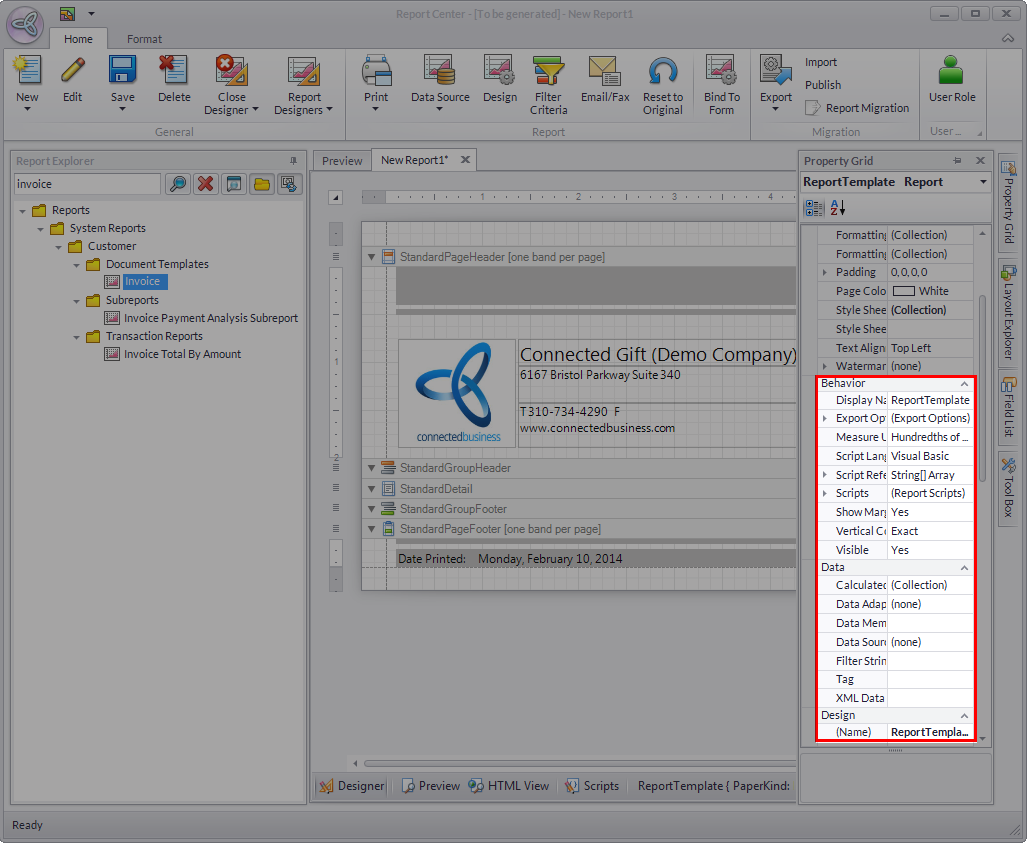
Click Image to Enlarge
In Connected Business v14, this redundancy has been removed, with the elements of the form now only being made part of the Property Grid.
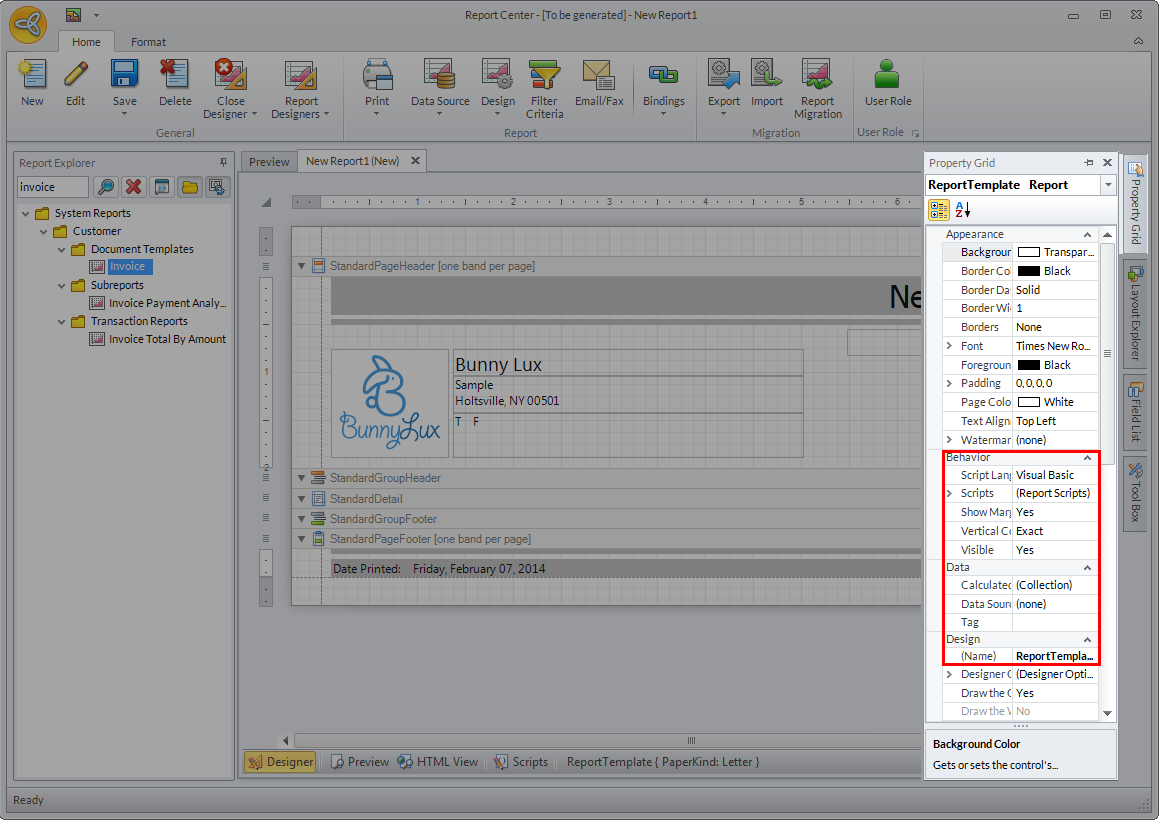
Click Image to Enlarge
Replace Data Source
In Connected Business v13, the only way to replace a Data Source assigned to the report was by going back to the Data Source form and selecting a new Data Source.
Click Image to Enlarge
Replacing a Data Source this way might affect the current report settings and may cause some Data- Source related settings to not work properly.
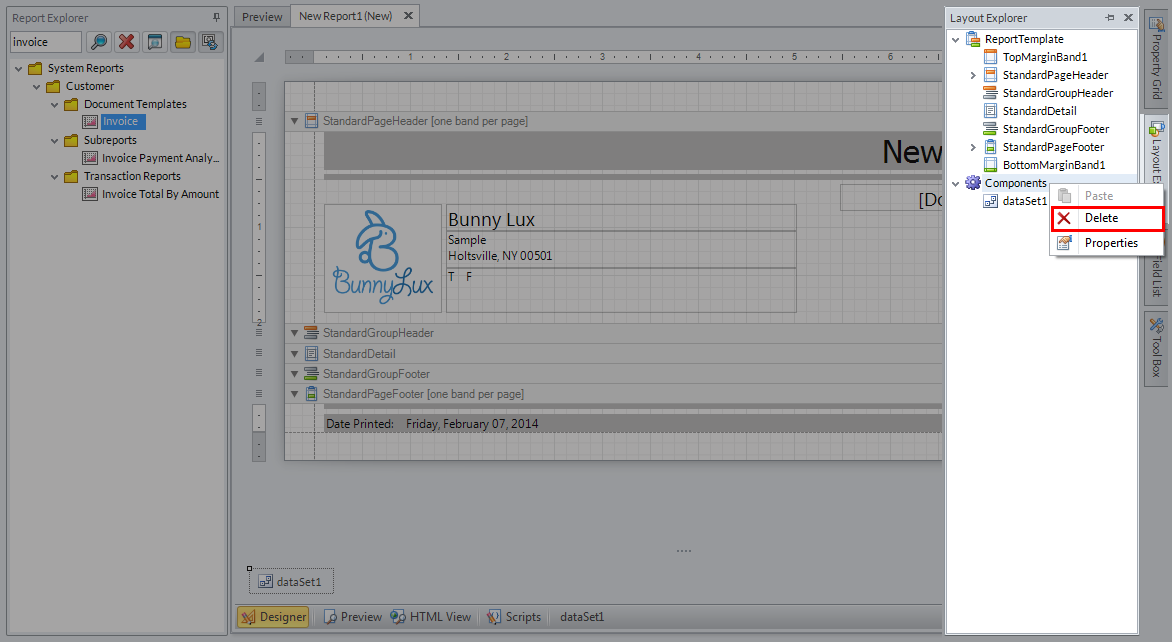
To replace a Data Source in Connected Business v14, the user only needs to:
- Expand the Layout Explorer fly out panel.
- Right click the Components report element and select Delete. This will remove the associated Data Source, allowing the user to assign a new one.
Click Image to Enlarge
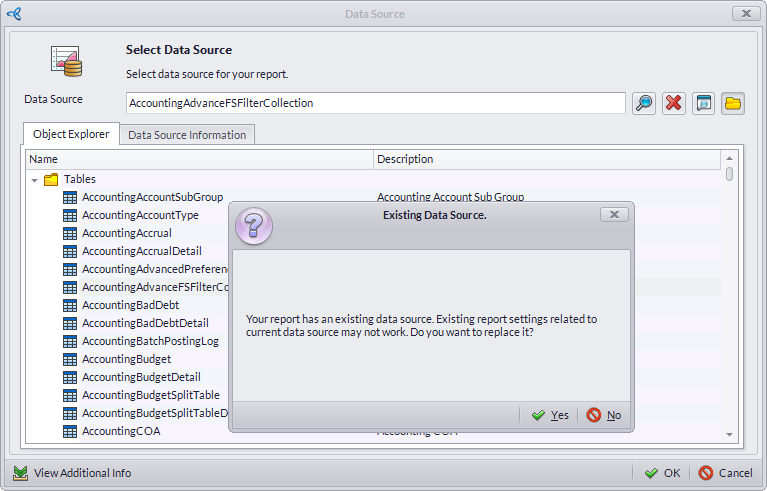
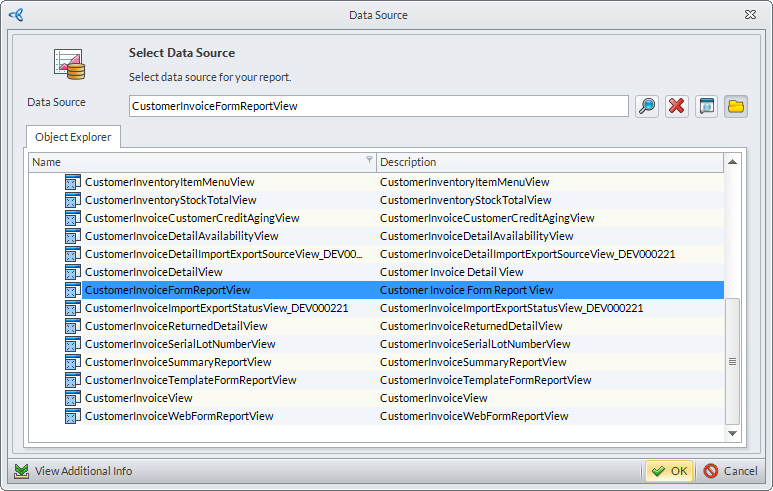
- Click the Data Source button in the ribbon and choose from Tables, Views, and Stored Procedures. The Data Source form will be displayed.
- Search and select a Data Source for the report then click OK to apply.
Click Image to Enlarge
Clicking on any between Tables, Views, and Stored Procedures opens the same form. You can collapse the current folder to search other folder or simply use the Search function to select a Data Source.
Bind Report to Form
Binding a report to a form means that you are linking the designed report to a business process (e.g. the Sales Order Report to the Sales Order Business Process and the respective form). This ensures the correct and orderly presentation of relevant business process information. Please refer to the Bind Custom Report to Form documentation for more details.
In Connected Business v13, this is done in the following manner:
- From the Report Center, click the Bind To menu. The Bind To Form will be displayed.
- Click the ellipsis under the Form field to select which form to bind the report to. Set the values for the Visibility and Filter Setting Fields, as well as set whether a Prompt to Save will occur. Click OK toapply changes and continue.
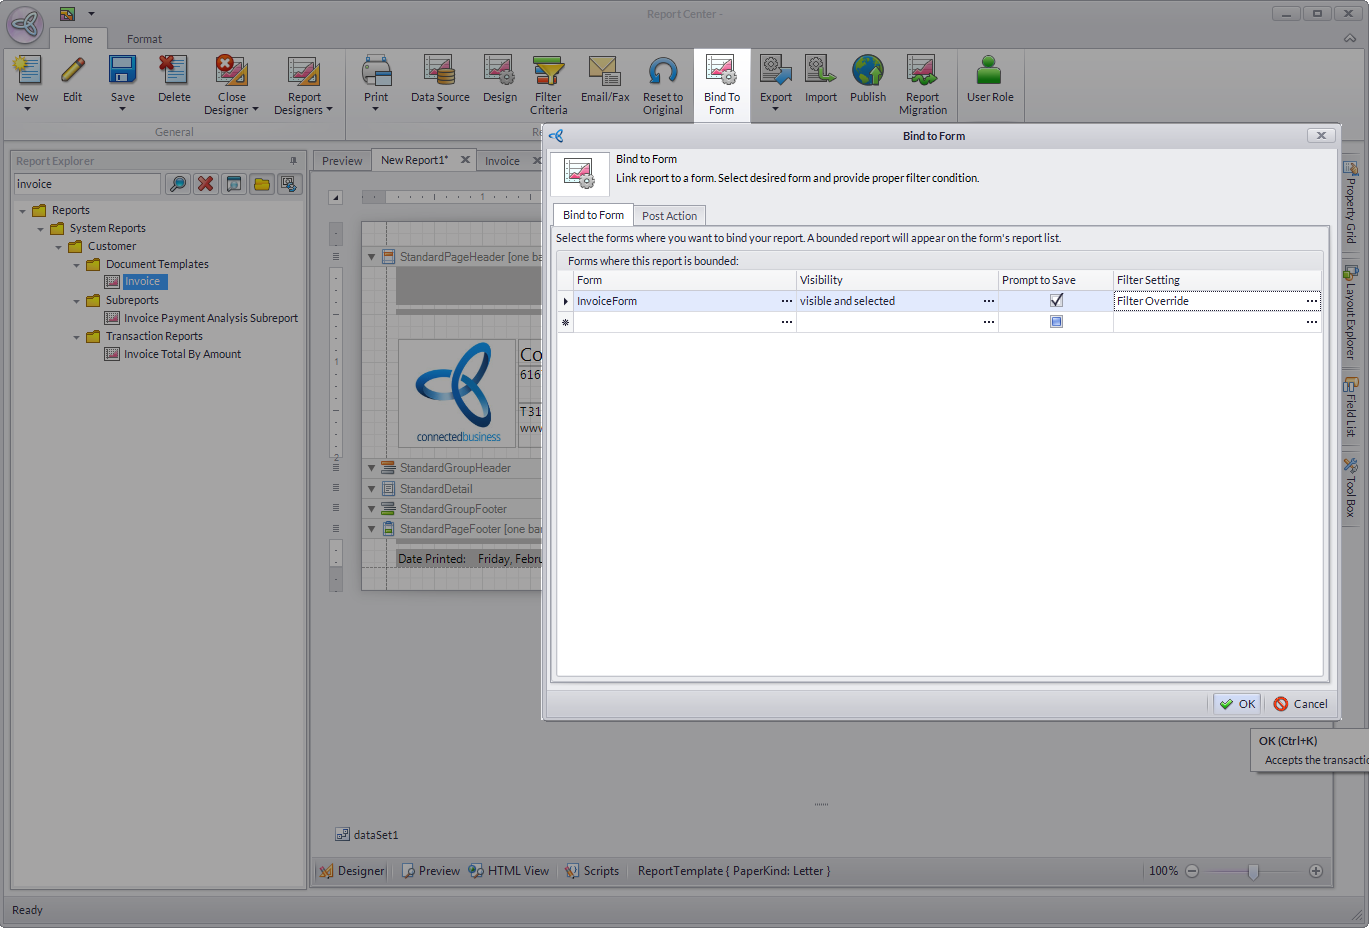
Click Image to Enlarge
In Connected Business v14, you can access the Bind To Form from the Report Center > Bindings > Bind To form.
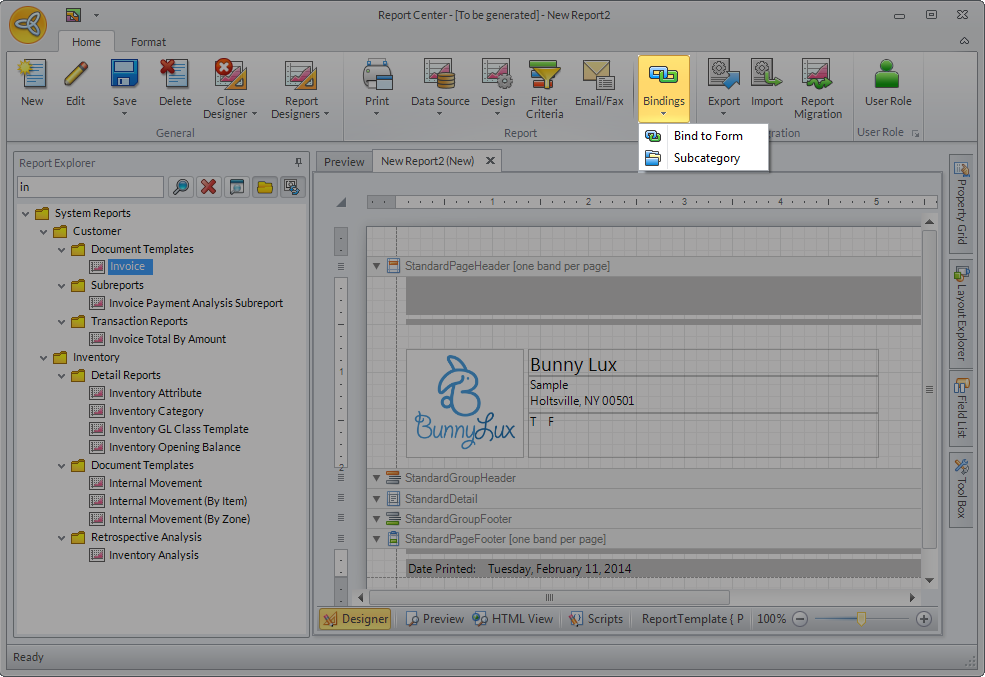
Click Image to Enlarge
In addition to binding a report to the Business Process form itself, reports can now also be bound to Subcategories. These are special cases where the report may be used, as long as the transaction meets the criteria.
To bind a report to a Subcategory,
- On the Report Center ribbon, go to Bindings > Subcategory. The Report Subcategory form will be displayed.
- Add as many Subcategories as necessary. Click OK to apply changes and proceed.
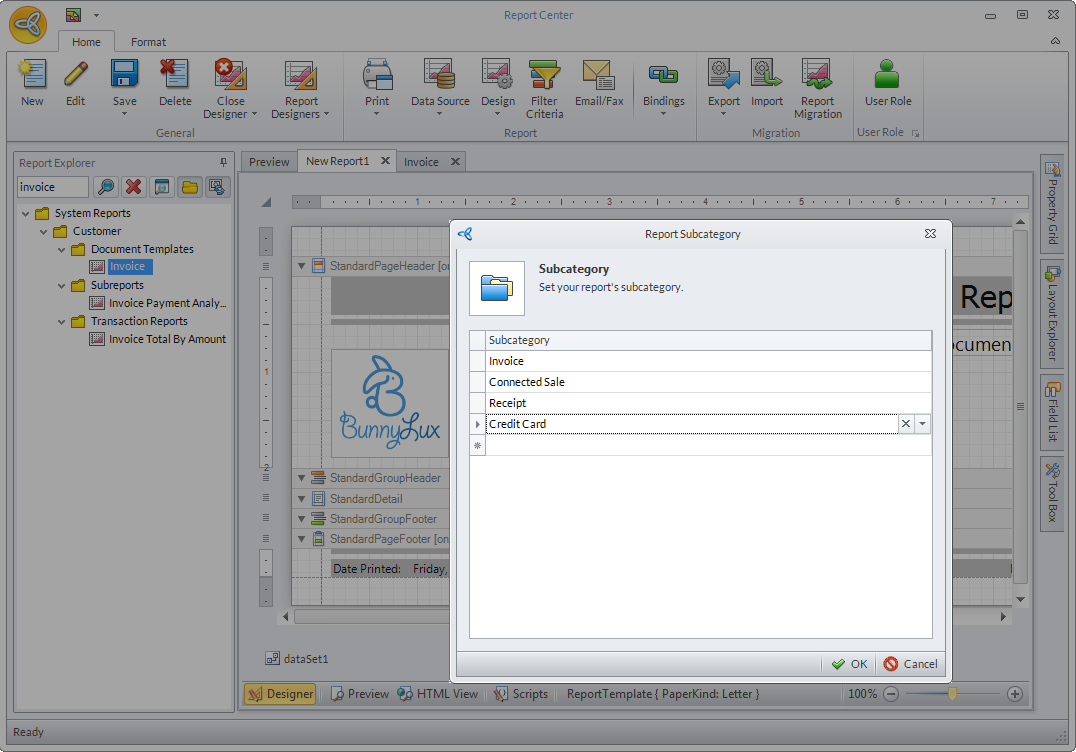
Click Image to Enlarge
In Connected Business v14, the report can’t be bound to a form without a Data Source being assigned.
![]()