Manage Sales Opportunities
|
Content
|
|---|
Overview
Opportunities are favorable situations or chances that offer profitable results to your sales. Through the sales opportunities feature, you will be able to estimate and manage sales opportunities.
In Connected Business, an analysis dashboard for sales opportunities is available to let you know how well you are doing in your opportunity management.
Record New Sales Opportunities
Steps
- From the CRM module, click Opportunity > New Opportunity button from the menu options. The Opportunity form will display.
Fill out the the fields on the Opportunity form.
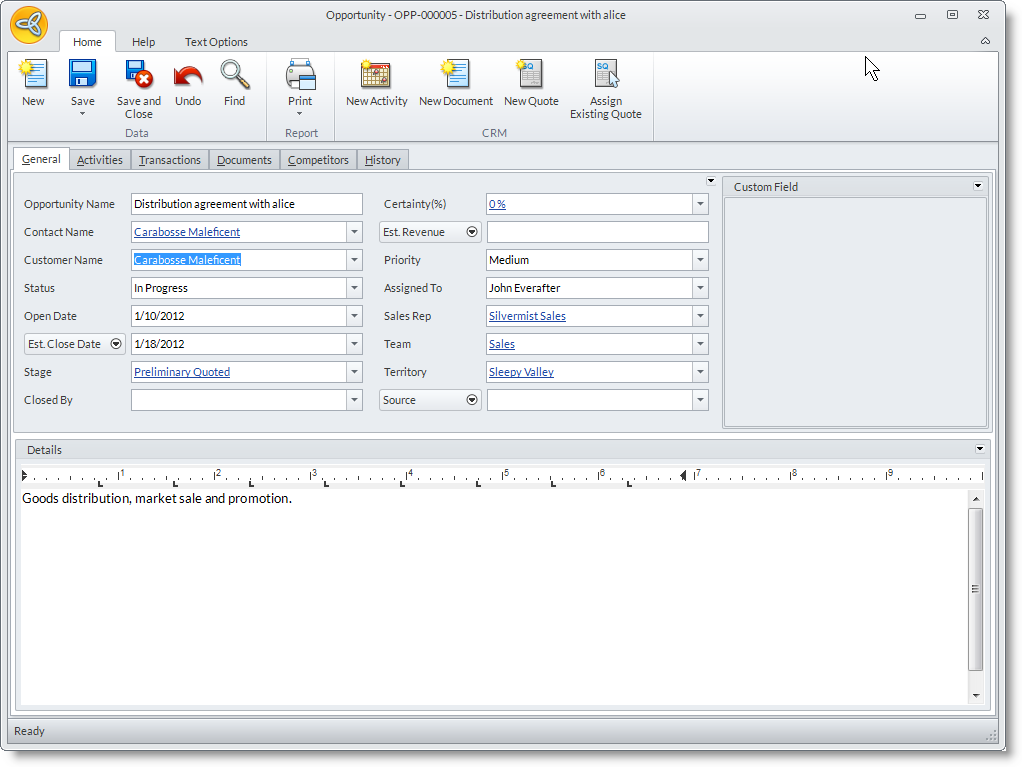
Opportunity Fields
Definition
Opportunity Name
Specify the name of the opportunity.
Contact Name
Select the entity Contact from the drop down list related to the opportunity.
Customer Name
Specify the name of the customer related to the new opportunity.
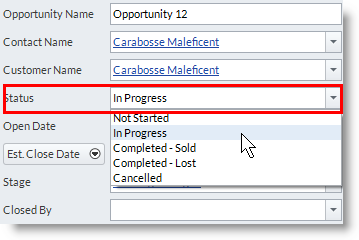
Status
Set the progress of the opportunity with the following options: Not Started, In Progress, Completed – Sold, Completed – Lost and Cancelled.
Open Date
Set the open date as to when the opportunity is created.
Est. Close Date
You can either set the estimated closing date or the closing date of the opportunity.
Stage
The default stage for the opportunity is set to Preliminary Quoted. Set the stage for the opportunity as it progresses.
The options are as follows:
- Preliminary Arranged,
- Meeting Arranged,
- Revised Quote / Awaiting Order,
- Another Meeting Required,
- Requested More Information
Closed By
Set the user to close the opportunity.
Certainty
Defines how close the prospect is to place an order. The default value is 0%; you may change the estimated certainty percent as follows:
- 10% - The prospect has been qualified and you have been able to at least obtain that they have a need that our application can solve.
- 20% - They have a need we can solve and have shared an approximate timeline to making a decision.
- 30% - They have a need, have shared a timeline, and have inquired for some pre-sales assistance (demo, preliminary product questions, looking to talk with a partner, etc.)
- 40% - The lead has been assigned to a Partner and you can verify that the partner has followed up on the opportunity.
- 50% - The partner has further qualified the opportunity, met with the customer and indicated that the opportunity is moving forward. At this point, you and the partner should have a good idea as to the size of the opportunity. TO REACH THIS LEVEL OF CERTAINTY, YOU NEED TO HAVE A QUOTE ATTACHED TO THE OPPORTUNITY IN THE SYSTEM.
- 60% - Prospect is actively working with the Partner to define requirements and move forward.
- 70% - Prospect has indicated they would like to receive a proposal.
- 80% - Prospect has given Verbal approval.
- 90% - Partner has received Agreement and order is expected to Connected Business.
- 100% - Partner has placed the Order with Connected Business.
Est. Revenue
Defines the approximate value (amount of income) that can be generated from the opportunity.
You may also click on the drop down to select Order Revenue or Quote Revenue fields. These fields may view the actual value of the quote(s) or order(s) generated from the opportunity.
Priority
You may set the order of importance of the sales opportunity as to Critical, High, Medium or Low.
Assigned To
The user who is currently logged in to the Connected Business.
Sales Rep
Set the Sales Rep for the sales opportunity.
Team
You may specify the team as to where the current user belongs.
Territory
Select the area where the opportunity takes place.
Source
Select the source of information or marketing strategy used in the Opportunity.
Optional: You may also select a campaign wave document that you will relate to the Opportunity. To view the Wave field, click on the arrow button next to the Source field then click Wave. - In the Detail section, you may enter additional details related to the opportunity.
- In the Activities tab, you may create new activities related to the opportunity.
- In the Competitors tab, you may specify the details to the competitors for the opportunity. You may set up competitors from Setup > Opportunity Competitors.
Record Related Activities
- In the Opportunity form, go to the Activities tab. The Activity tab works as the Activity Calendar that you can use to schedule and maintain activities related to the opportunity.
- To create a new activity you can do one of the following:
- Click on the New Activity button from the menu of the Activities tab. The Activity form will display. The Start Dateis set to default current date.
- Double-click on a day or time in the Activity Calendar. The Activity form will display. The Start Date is set to the selected date in the calendar. See Also: View Activity Calendar
Attach Document
- Click on the New Document button to switch to the Documents tab and browse for the document from your computer.
- To add more documents, click on the ellipsis button in the File Name column and select from the options to attach from the computer or from the Document Management.
See Also: Manage Documents
![]()
Follow up on Sales Opportunities
Steps
- From the CRM module, click on Opportunity > New Opportunity.The Opportunity search screen will display.
- Search for the opportunity record and select to display the Opportunity form.
- Edit the details as necessary or change the opportunity stage and save the form again before closing.
Cancel the Opportunity
- To cancel the opportunity, set the opportunity status to Cancelled.
Close the Sales Opportunity
Opportunities are closed by doing any one of the following:
- If a quote related to the opportunity is converted into sales order, the opportunity stage will be automatically set as Completed-Sold. In the Closed By field, select the user that closed the opportunity. You can also do this manually by changing the status in the Status field to Completed-Sold.
- If the opportunity was lost or you decided not to follow up on the opportunity, you may close the record by setting the Status as Completed-Lost. The Closed By field will be replaced with Reason. In this field, you may select the opportunity reason that will determine why the opportunity is lost. You can define more opportunity reasons from CRM Module > Setup > Opportunity Reasons.
View the Opportunity Sales
- See Also: View Opportunity Analysis Dashboard
![]()
View Opportunity Analysis Dashboard
The Opportunity Analysis dashboard shows the opportunity analysis in multiple ways. The Opportunity Analysis dashboard has a customizable list view and many different chart and analysis views. The Filter Options pane can be used to refine your search for opportunities by date, priority, status or user assigned. Commonly used filters may be saved for easy look up of opportunity records.
Steps
- Click on the Dashboard menu and select Opportunities. The Opportunity Analysis dashboard is displayed.
- The Filter Options sliding pane can be used to refine search for cases by Date, Priority, Status or Assigned To (users).
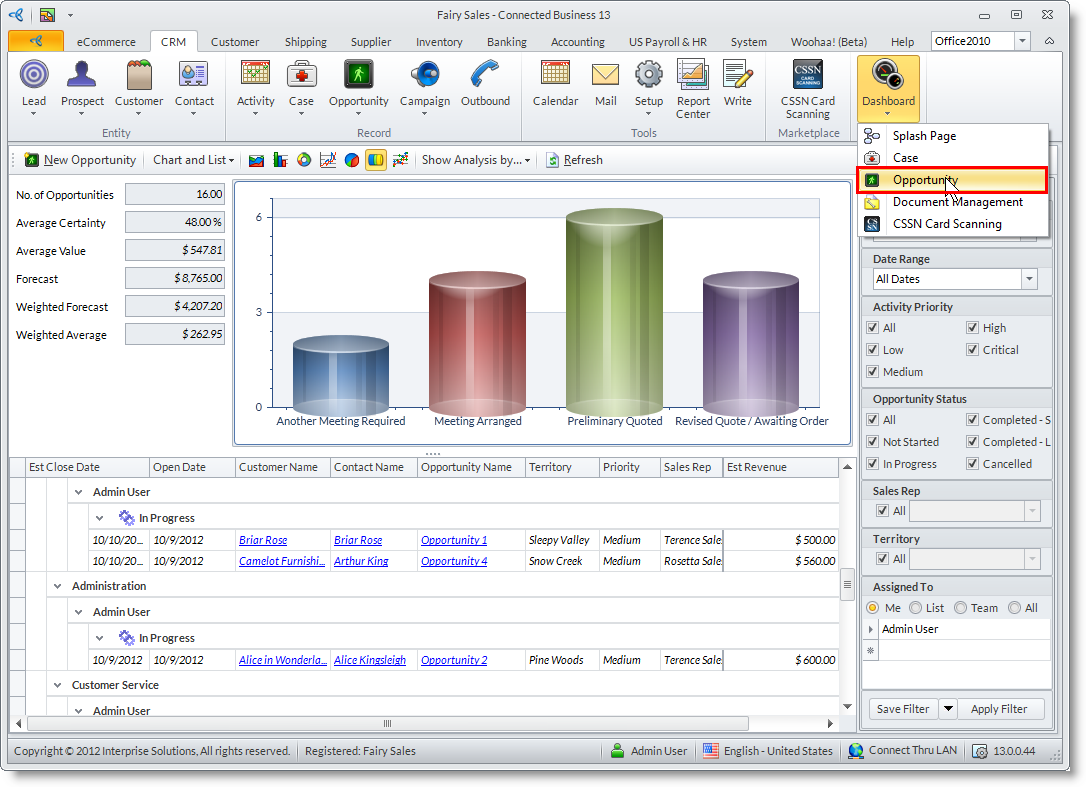
Change the Dashboard View
- Change the chart view by clicking on the Chart Types (
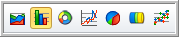 ) in the dashboard menu.
Change the Analysis View
- Switch analysis type by clicking on Show Analysis By pulldown and selecting from the options. You can change the analysis by the following options: Stage, Status, Quote Revenue(Sales), Order Revenue(Sales), Estimated Revenue, All Values
Filter Records Displayed in the Chart and List
- From the sliding pane, click on Filter Options. The default filter, My Default Filter, shows all case records.
- You can modify the default filter and create new preset filters. To do this, modify the filter by selecting the criteria of what you want it to show e.g. all high and critical priority opportunities or all opportunities assigned to a user.
- by Priority or Status
- by Territory or Activity Category
- by Assigned To (user)
- Click Save Filter button to save the changes to the default filter or click on the pulldown arrow button to view the option Save New Filter As. Click on this to enter the label for the new filter.
- You can apply the filter by selecting from the Load Saved Filter pulldown and clicking on the Apply Filter button.
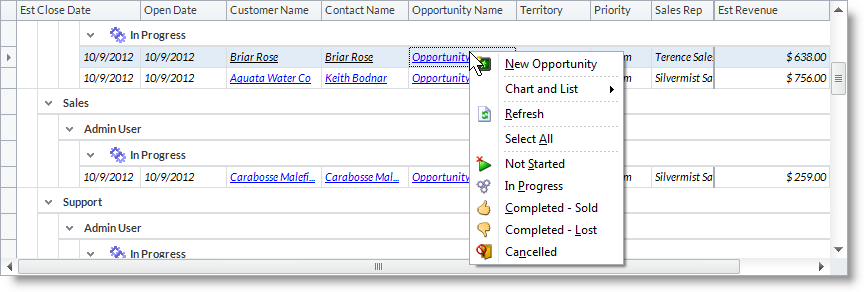
Change the Opportunity Status from the Opportunity Analysis Dashboard
- Right-click on an opportunity record in the List section of the Opportunity Analysis dashboard to view the options.
View Full Details of the Opportunity
- From the List section of the Opportunity Analysis dashboard, drill down on the opportunities’ subject in the Subject column to display the Opportunity form.
Create New Opportunities from the Opportunity Analysis Dashboard
- From the Opportunity Analysis dashboard menu, click on the New Opportunity button to display the Opportunity form.
- Right-click on the Chart or List section to view the options and select New Opportunity to display the Opportunity form.
![]()