Manage Documents
|
Content
|
|---|
Overview
The Document Management dashboard allows you to keep your documents organized and in one place. This feature allows reliable safekeeping of files in the database to make it more accessible for users connecting remotely to Connected Business.
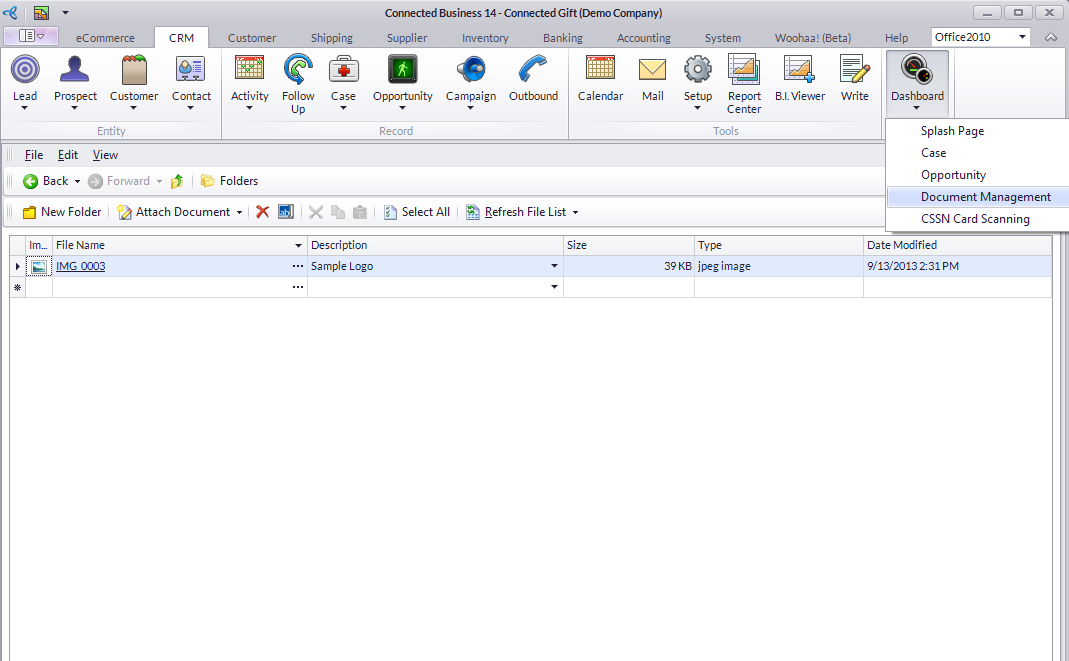
View the CRM Document Management Dashboard
Steps
- From the CRM module, click on Dashboard > Document Management.
Move Through Folders
- To move through folders you recently viewed, use the Back and Forward menu items (
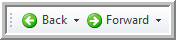 ).
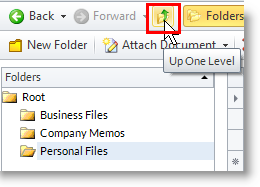
). - To move up the folders, click on the Up One Level menu item.
![]()
Add Folders and Files
To create new folders,
- Highlight the folder in the list where you want the folder to be created.
- Click on New Folder option from the menu options.
- Rename the new folder and press Enter key to apply the folder description.
To add files,
|
|
You may attach any kind of document in the Document Management. Documents added herein takes up space in your company database so consider adding large files. |

- Select the folder in the Folder list where you want to place the new file.
- Browse for the document to add by:
- Clicking on the Attach Document button from the menu.
- Right clicking on the File list and selecting Attach Document.
- Clicking on the ellipsis button in the File Name column and selecting Attach Document.
- Select a document type and browse for the document.
- Select the document and click Open to add.
- Refresh the file list by clicking on the Refresh File list option.
![]()
Rename a File
-
Highlight the folder on which you want to rename, then click on the Rename button from the menu. Alternately, you may right click on the folder and select Rename.
Opening Files
- Drill down on the File Name and Connected Business will try to open the file using the appropriate application and would ask to select if otherwise.
Deleting Folder and Files
To delete a folder,
- Select a folder in the Folder list and select Delete option from the menu.
- Right-click on the folder in the Folder list and select Delete.
To delete files,
- Select a file in the File list and select Delete option from the menu.
- Right-click on a file in the File list and select Delete.
![]()
Create New Document Type
The default document type used in the Document Management is “Attach All”. With this document type, you can attach documents of any file format. To add new document types,
- From the CRM module, click on Setup > List > Document Type. The Document Type setup form will display.
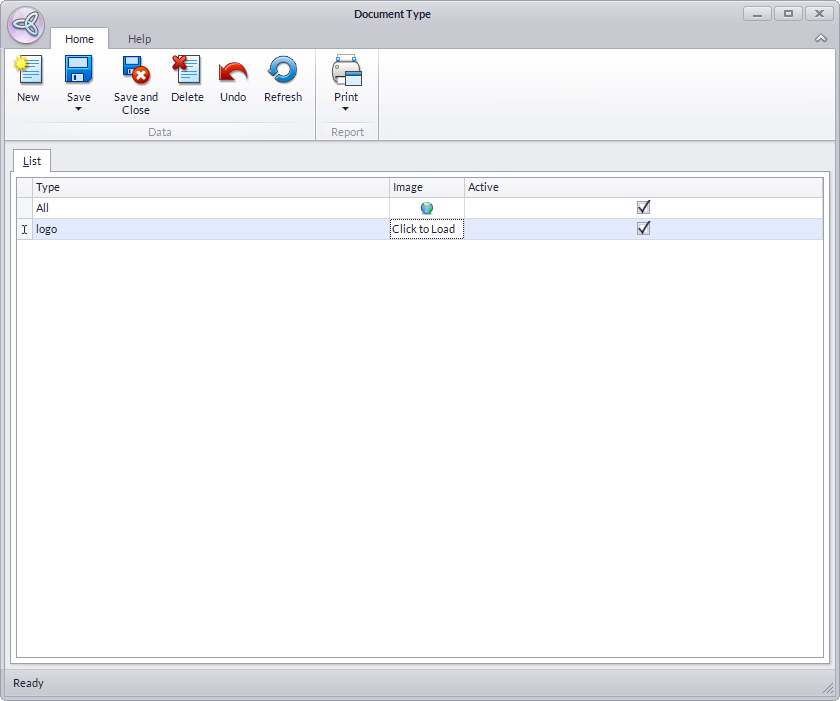
- Specify the name of the document on the Type column. You may add an image to easily recognize the format of the document on the system.
- Click Save and Close.
Attach Documents from the Document Manager
You may attach documents to records to provide additional information.
To attach from the Document Management,
- In detail forms, e. g. Customer or Supplier, go to the Documents tab. In transaction forms, e.g. Sales Order, Purchase Order, go to the Attachments tab.
- Select Attach Document > CRM Document Management. The Attach from Document Management window will display.
- Click the containing folder.
- Select the files to attach by clicking on the checkbox before the File Name column.
- Click Attach button to attach.
To attach files to multiple documents,
- Select the Attach Document option in the Tools menu of the Customer or Supplier module.
See Also: Attach Documents
![]()